22 December 2019

Christmas Gingerbread House


The Art.
    Merry Christmas, everybody! One of my favorite ways to celebrate the season is to make beautiful gingerbread houses with my family. It's a great opportunity to do something creative to decorate your home...and then eat it. It's also an activity that everyone can enjoy. My husband even joined in this year and make a garage full of cookie sports cars. As you can see, my house is more traditional and uses primarily piped icing technique instead of candy decorations. But, if peppermints and jelly beans are your thing, go ahead and eat your heart out. Two elements that I incorporated this year to take my gingerbread house to the next level were windows made of gelatin sheets, and lighting up the interior with a battery-operated LED light for a warm glow. Putting Christmas trees inside the house also gave the interior a nice three-dimensional effect. There are many directions you can take when decorating your gingerbread house, so I encourage everyone to get creative and have fun!

The Science.
    The best way to ensure you have a beautiful gingerbread house is to break out a skill I haven't used since high school: geometry. I know, try not to panic. As long as you have a pad of graph paper and follow these basic rules, you will be fine. You will use the graph paper to cut out stencils to trace your gingerbread pieces. First, make sure the vertical walls of your house are all the same height. You can use the same stencil for the front and back, and then another for both sides of your house. If you're making a traditional four-sided house with a gabled roof, then you need to make sure your rectangular roof pieces are at least 1/2 inch longer on each side than you think they should be. This is because the seams between the supporting walls will take up about 1/4 inch, and the same goes for the seam at the top of the roof. If you are planning on filling your house with elements (like my LED light and trees), it helps to make a large hole on the back that you can fit your hand inside.


  I also have another tip for keeping your windows square. When you cut the windows into the dough, don't remove the pieces, but rather leave them in while baking. Then, right after you take the cookies out of the oven, use a sharp knife to gently pop the windows out. This prevents the dough from puffing up and spreading into the negative space of the windows. If you follow these suggestions, you will end up with a symmetrical, clean-cut base for all your whimsical decorating!

The Recipe.
    For this gingerbread house, I used my Gingerbread Cookie recipe found here. One batch of dough is enough for two houses approximately 8 inches high. You will also need a batch of royal icing, recipe found here. The icing you use to glue your house together should be about the consistency of toothpaste, so keep adding powdered sugar until it's the correct consistency. 
    If you are using gelatin sheets for windows, be sure to glue them on before you assemble the walls. I find the best way to assemble the house is to fill a piping bag with the icing and pipe it onto the gingerbread with a wide round tip, then hold the pieces together for about 1 minute until they are set. Now that the house is constructed, you're ready for the fun part!
    This house has many little details that add dimension. I made evergreen ivy trailing up the walls with royal icing that I dyed green and piped with a small leaf tip. I added icicles along the gables using a small round tip, and made the windows look frosty by filling the windowsills with white icing and adding sparkle sugar. 

   The Christmas trees were made by covering sugar cones with green icing using a star tip and finishing with Wilton Rainbow Star Medley sprinkles. Finally, a bright red door with a crumbled Oreo path completed the house.

    We had a lot of fun making our houses, and I hope you will, too! They look great displayed on the table under a glass cake dome, but they also taste great if you decide to gobble them up. Either way, have a happy holiday!


26 August 2019

Banana Split Cake


The Art.
    One of the best things about summer vacation is enjoying a huge banana split in the sunshine. In the name of summertime, I wanted to capture the essence of the banana split in a cake. So, I created this pretty treat! It has everything: three layers of cake representing the vanilla, strawberry, and chocolate scoops of ice cream, caramelized bananas, chocolate ganache, even cherries and rainbow sprinkles. The great thing about this recipe is it makes cupcakes as well, so you can feed quite a crowd from just one banana split.

The Science.
    The tricky part for this cake was to incorporate the strawberry and banana flavors without compromising the texture of the cake itself. I spent a lot of time a few years back developing the perfect white cake recipe, and I knew that if I added fruit to it I would have to go through all kinds of testing again to compensate for the added moisture. I avoided this problem by instead putting the strawberry flavor in the icing and only dying one of the cake layers pink. Then, I caramelized the bananas to prevent them from becoming a gross, brown mess (as sliced bananas are wont to do) and used them as the filling between the cake layers. This way, I still had all the required flavors in the cake, without investing too much in the old R&D. One suggestion I do have is dividing your baking up over a couple days. I made the chocolate cake and cupcakes the first day, then finished everything else on the second day. Another good idea is to ensure the maraschino cherries are thoroughly rinsed and drained on paper towels so they don't drip pink goo all over your icing.

The Recipe.

Chocolate cake:
2 cups sugar
2 cups flour
1 1/2 teaspoon baking powder
1 1/2 teaspoon baking soda
1 teaspoon salt
1 cup boiling water 
1 cup dutch cocoa
2 eggs
1 cup milk
1/2 cup vegetable oil
1 teaspoon vanilla 

    Preheat oven to 350°F. Spray a 6x3-inch round baking pan with baking spray, and line with parchment paper. Also prepare a standard cupcake tin with cupcake liners. In a medium bowl, combine sugar, flour, baking powder, baking soda, and salt. In a small bowl, dissolve cocoa in boiling water to allow it to "bloom." In a large bowl, beat together egg, milk, oil, and vanilla. Add dry ingredients and beat on medium speed for 2 minutes. Stir in bloomed cocoa. Fill cake pan and cupcake tin 2/3 of the way, and bake on center rack for 20 minutes. Cool cake in pan for 10 minutes, then invert onto a wire rack to cool completely. Once cool, peel off the parchment paper.


White cake:
6 egg whites, divided
1 1/2 cups sugar, divided
2 1/4 cups cake flour
3 teaspoons baking powder
3/4 cup salted butter 
2 teaspoons vanilla
1 1/3 cup buttermilk

    Preheat oven to 350°F. Coat 2 6x3-inch round pans with baking spray and line with parchment paper. Prepare a standard cupcake tin with liners. In a medium bowl, beat three egg whites on medium speed until frothy. Gradually beat in 1/2 cup sugar and continue to beat until soft peaks form. Set aside. Sift together flour and baking powder in another bowl. In a large bowl, beat together remaining cup sugar, butter, remaining egg whites, and vanilla. Alternately add one third of the flour mixture and buttermilk, beating between each addition just until combined. Fold in beaten egg whites with a spatula. Divide batter in half, and tint one batch pink (I used Wilton Icing Colors Pink). Pour each batter into a pan until 2/3 full and smooth the tops with a spatula. Fill the cupcake tins until 2/3 full as well. Bake on center rack for 20 minutes, or until tester comes out clean. Cool 10 minutes in pan, then invert onto wire racks to cool completely and remove parchment paper.


Strawberry buttercream:
2 cups (1lb) salted butter, room temperature
1/3 cup seedless strawberry jam (e.g. Hero Strawberry Fruit spread)
5-7 cups powdered sugar

    In large bowl, beat together butter and jam on medium speed until fluffy. Beat in powdered sugar, one cup at a time. Add sugar until icing makes stiff, jagged peaks. If icing tastes too sugary or grainy, add a couple tablespoons of milk. 

Caramelized Bananas:
2 ripe bananas, diced
2 tablespoons salted butter
2 tablespoons brown sugar

    Melt butter in a frying pan on medium heat. Add bananas and cook until light brown on both sides. Add brown sugar and stir bananas to coat, continuing to cook until caramelized, about 3 minutes.

Dark chocolate ganache:
4oz 60% cacao bar chocolate (e.g. Ghiradelli baking bar)
1/4 cup 40% heavy whipping cream

    Break up chocolate into bits and place in a small microwave safe bowl. Add cream and microwave in two 30-second intervals, stirring between. Be careful not to overheat, or the chocolate will seize up and become hardened. Continue to stir until the chocolate completely melts and becomes glossy. Cool slightly before dripping onto the cake.

Assembly:

Gather these additional supplies:
2 jars maraschino cherries with stems, rinsed and drained on paper towels
rainbow sprinkles
1M piping tip and piping bag

    Place the chocolate cake layer on a cardboard cake circle or rotating cake stand and cover with a thin layer of icing and half of the bananas. Place the pink cake on top, covering with icing and the remaining bananas, then top it off with the white cake layer. Spread a thin coat of "dirty" icing all over the cake before placing it in the freezer to cool (we'll make it look pretty later). Meanwhile, pipe icing on the cupcakes with a 1M star tip (technique here). Top with cherries and sprinkles.
    Pull the cake out of the freezer and cover with icing using an offset spatula. For a very smooth finish, use an icing smoother and rotating cake stand. Be sure to get the top of the cake very level. Spoon the slightly warm ganache on top, using the technique described in my Candyland Drip Cake recipe. For the finishing touches, pipe 6 small 1M swirls on top of the cake, top with cherries, and (judiciously) add some rainbow sprinkles. 

    Display this show-stopping cake and cupcakes as your centerpiece at your party or barbeque, with a sliver cut out so everyone can appreciate the layers. Adding some confetti to the table also adds some festivity and ties in the rainbow sprinkle theme. Leftover cake can be stored in the refrigerator for up to four days.

05 May 2019

Donkey Piñata Cake

The Art.
    Happy Cinco de Mayo! I hope you all had plenty of tacos and tequila. To celebrate here on Brainy Buns, this is the most piñata-y cake I could make. Not only does my creation look like an adorable donkey piñata on the outside, but it is also filled with delicious candy that spills out when the cake is cut. But it doesn't stop there! Brightly colored cake layers and churro icing are also found inside. This little donkey is ready to party, right down to his little tail!

The Science.
    I spent a lot of time trying to figure out what flavors to incorporate into this cake. There are so many delicious Mexican flavors to choose from, and for a brief moment I even considered filling the cake with prickly pear jam. In the end, I settled on churros because they're the one Mexican sweet I can never get enough of. In order to get the malty, cinnamon flavor of churros into my cake, I crushed up Cinnamon Toast Crunch cereal and mixed it into the icing before spreading it between the cake layers. This gave the icing a convincing churro flavor, and also a wonderful crunch! Of course after making this I discovered that General Mills actually sells a churro cereal, so if you would like to try putting that in your icing instead, go for it!

The Recipe.

Yellow Cake:

3 1/3 cups cake flour
4 teaspoons baking powder
1/4 teaspoon salt
1 cup salted butter
2 1/4 cups sugar
6 eggs
3 teaspoons vanilla
1 1/2 cups buttermilk

    Preheat oven to 350oF. Spray four 6inch x 3inch cake pans with baking spray and line with parchment paper. In a medium bowl, comine flour, baking powder, and salt. Beat butter in large bowl on medium-high until fluffy, then gradually beat in sugar. Beat eggs in, one at a time. Stir vanilla into buttermilk. Alternately add flour mixture and buttermilk to butter/sugar/egg mixture while beating on low speed.  Beat an additional 30 seconds.
    Divide the batter equally into four bowls and dye blue, orange, pink, and purple with food coloring.  Pour batter into pans and lift and drop the pans on the counter a couple times to eliminate bubbles in the batter. Bake on center rack for 20 minutes, or until a toothpick inserted into cake comes out clean. Cool the cakes for 10 minutes, then turn onto a cooling rack and remove the parchment paper to cool completely


Buttercream icing:
2 cups salted butter, room temperature
6-8 cups powdered sugar
1 teaspoon vanilla
1 cup Cinnamon Toast Crunch cereal, crushed

    In a large bowl, beat butter on medium speed until fluffy. Beat in vanilla. Gradually beat in powdered sugar, until icing becomes thick enough for piping. I look for stiff, jagged peaks as my indicator. Adding the sugar in increments results in better incorporation into the butter, so you can use less sugar for the same consistency. If the frosting tastes too sweet and feels grainy, add a couple tablespoons of milk.
    Divide icing into five bowls. Tint four bowls blue, pink, purple and yellow with gel icing colors. (It will take A LOT of dye, be patient.) Stir the cereal into the white icing, which you will use between the cake layers.

Assembly:
Gather together these additional supplies:
Candies
Sugar cones
Wilton fondant: pink, black, and white

    Once cakes have cooled, use a 1.5-inch round cookie cutter to cut the center out of three of the cake layers. (Do not cut a hole in the top layer.) Stack the bottom three layers, spreading the churro icing between as you stack them. Fill the hole in the center with whatever candies you like. I used pretzel M&Ms because I like the shape and colors, and the crunch adds nice texture. Place the final cake layer on top.

    To ice the cake, I used a rose petal tip #104 to make the multicolored ruffles. This will go much faster if you have four #104 tips, but you can switch between colors with one tip if you don't. I highly recommend using a rotating cake stand for this, as well. Rotate the cake slowly and move the tip toward and away from the surface of the cake as you pipe to make the ruffle pattern. I found that three rows of ruffles for each color looked just right. It also helps to start and end rows on the back of the cake, so those seams can be covered up by the tail. To make the ears, take two sugar cones and place them upside down on top of the cake, and cover them with icing ruffles.
    To make the donkey's cute little face, knead together some of the black and white fondant to make gray. Roll out the gray fondant with a rolling pin, using a sprinkling of powdered sugar to prevent sticking. Cut out an oval to make the snout, and then roll two U-shaped nostrils of the black fondant. Stick the nostrils onto the snout with a small amount of water and let them set together a few minutes before gently pressing the snout onto the front of the cake. For the eyes, cut out two black circles of rolled fondant and four smaller white circles of fondant. Affix them together with water to create shiny anime eyes before gently pressing them onto the cake above the snout. You can make the tail by rolling a rope of black fondant with your hands, and then snipping and shaping the end to look like hairs. Attach the tail with a couple of toothpicks. The toothpicks will be covered up by the bow, which you can assemble from strips of pink rolled fondant. 
    Cutting this cake is all part of the ceremony! It's great to hear your guests gasp as the piñata candy spills out. On the off chance that you have cake left over, you can store it in the fridge for a few days. 

22 December 2018

Chocolate Roll Cake


The Art.
    It's Christmas baking time, everybody! I've posted quite a few Christmas cookies over the years, including Iced Snowflake Sugar Cookies, Gingerbread Cookies, and a Meringue Christmas Tree. This year, I wanted to step away from the cookies and make a pretty Christmas cake. The idea of making an iced yule log was appealing, but by now everyone has eaten so many sweets they didn't even want to think about icing. So, I settled on this simple Chocolate Roll Cake. A naked dark chocolate sponge filled with barely sweetened whipped cream is the perfect treat for everyone who's had a few too many of Santa's cookies...but still has room for a little more.

The Science.
    The trickiest part of making a roll cake is getting a beautiful swirl shape without any splits or cracks. There are several factors that contribute to success here. First, this cake is a flourless sponge with lots of whipped egg whites that make the cake very elastic and easy to handle. Second, baking the cake on a silicone mat not only prevents the bottom from getting overbaked and dry, but also helps immensely with the rolling process because you can use the mat for support as you roll. And finally, rolling the cake up while it's warm and cooling it in this shape makes a beautiful round roll that won't look squashed in the end.

The Recipe.

Flourless Chocolate Sponge:
6 egg whites, at room temperature
1/4 teaspoon cream of tartar
3/4 cup sugar, divided
6 egg yolks
1/3 cup dark cocoa powder

Preheat oven to 350°F and line a 10in by 15in jelly roll pan with a silicone mat. Whip the egg whites and cream of tartar on medium-high speed until soft peaks form. Gradually add half the sugar while beating, until stiff peaks form. Set aside. In another bowl, combine the remaining sugar, egg yolks, and cocoa powder. Beat on medium-high speed for at least two minutes, making sure to scrape the bowl periodically. Getting this mixture well mixed and fluffy is very important for the texture of the cake. Add 1/4 of the egg whites to the chocolate mixture and stir to lighten the batter. Gently fold in the rest of the egg whites just until combined, making sure not to deflate the batter while doing so. Pour batter onto prepared pan with mat, spreading the top very evenly with a spatula. Bake for 15 minutes, until the center springs back when lightly touched with your fingertip. Cool in the pan for 10 minutes, then run a sharpe knife along the edges to release them from the pan. While the cake is still warm, dust the top with a small amount of cocoa and cover the top with parchment paper (the cocoa prevents sticking). Begin rolling up the warm cake from the short side, rolling up the parchment paper and the silicone mat right along with the cake. Once the cake is rolled, place it on the countertop with the outside edge on the bottom. Support the long sides of the cake with a rolling pin, baking pan, storage jar, or any other long object you have in your kitchen, in order to prevent the roll from sagging while it cools. Meanwhile, make the whipped cream.

Stabilized Whipped Cream:
1 teaspoon gelatin
3 tablespoons boiling water
1 cup heavy whipping cream, chilled
1/4 cup powdered sugar

    Place a metal mixing bowl and metal whisk attachment in the freezer for 15 minutes. Meanwhile, combine gelatin and boiling water in a small bowl and stir until dissolved. Gradually stir whipping cream into the gelatin, going slowly so the gelatin doesn't seize. Place whipping cream and gelatin in the refrigerator for 10 minutes. Whip the cream/gelatin in the chilled bowl with the chilled whisk on medium speed until soft peaks form. Continue beating while gradually adding the powdered sugar, until stiff peaks form. Refrigerate cream until the cake is completely cool.

Assembly:
    Gently unroll the cake and remove the parchment paper from the top, leaving the cake on the silicone mat. Lightly brush away any excess cocoa powder. Spread the whipped cream evenly over the top of the cake, leaving one inch bare on all the edges. Begin rolling up the cake from the short end, the same direction you rolled it before. As you start rolling, gently pull the silicone mat up and away from the cake with one hand as you form a tight cake roll with the other. Using the mat in this way supports the cake and helps you roll it more tightly. You want to roll the cake so that there are no air holes and the center has a nice swirl, but not so tight that you tear the cake. Going slowly and keeping the mat taught will make this easier.
    Once the cake is rolled, place it with the outside edge down on a cake board or serving dish. Cover
with parchment paper and support the long sides once again to keep a round shape. Refrigerate for at least four hours. Before serving, remove the parchment paper and trim off the short ends of the cake (approximately 1/2 inch) with a sharp serrated knife to reveal a beautiful swirl filled with cream. You may arrange the cake board with any decorations you wish; I chose rosemary sprigs, sugared cranberries, and star anise for a rustic Christmas theme. You can also skip the decorations and use a sifter to dust the cake with either powdered sugar or cocoa for a simpler look. Leftover cake can be stored in the refrigerator in an airtight container for up to three days.

05 August 2018

Pink Champagne Cake

The Art.
    This past year has treated me pretty well, so I decided to have a birthday celebration that my sister described as "extra." Printed invitations, wine, charcuterie, and this beautiful cake with pink champagne icing. You can tell I went all out because I splurged on a bottle of Pannier Brut Rose Champagne, which might have had something to do with the fact that the label matched my pink and gold theme. Gold edible confetti, glitter cake picks, and a table scattered with pink and gold confetti completed the look. Champagne is inherently celebratory, so you could also make this cake for a wedding shower, graduation, or anytime you would like to pop open a bottle.

The Science.
    Even with all of the glittery decorations, the champagne icing is what really makes this cake stand out. I had great success blending liquor into meringue icing for my Elderflower Cupcakes a while back, but this time I wanted an icing that was more sturdy for decorating. With this in mind, I decided to make a Swiss meringue buttercream. By adding the champagne to the cooked meringue first, the bite of the alcohol evaporated off, leaving the light fruity taste of the pink champagne. Cooking off the moisture in this step also helps the butter incorporate into the meringue at the end.

The Recipe.
    For the cake, follow the white cake instructions from my Orange Creme Cake, except pour the batter into three 6 x 3 inch round pans coated with baking spray and lined with parchment paper. If you would like a pink ombre effect, you can divide the batter into bowls and add pink food color before pouring into the pans. After baking, invert cakes onto a wire rack to cool completely. If you would like to make cupcakes as well, make a double batch of batter and pour the rest into lined cupcake tins and bake cupcakes for approximately 17 minutes.


Pink Champagne Swiss Meringue Buttercream:
4 large egg whites, at room temperature
1 cup sugar
1/2 cup rose champagne or sparkling wine
1 pound (4 sticks) butter, at room temperature
1/4 teaspoon sea salt
pink food color

    Bring 1 inch of water to a simmer in a small saucepan. Place the egg whites, sugar, and champagne in a medium metal bowl, then place the bowl over the simmering saucepan to make a double boiler. Make sure the bottom of the bowl is not touching the water, we only want the steam to cook the egg whites gently as they whip. Using a hand mixer, beat the mixture on high speed for 5 minutes, until stiff peaks form. Remove from heat, and continue to whip until the meringue is cool, about 2 minutes. Gradually add the butter while beating on high, 2 tablespoons at a time. Add the sea salt and food color and beat until completely incorporated and the icing is smooth. 

Assembling the cake:
    Level off any crown on your cake layers with a serrated knife. This will ensure that you have a beautiful, even cake in the end. Place the bottom cake layer on a rotating cake stand (or a flat plate or stand you can turn with one hand). Spread with icing, then place the next cake layer, and repeat. Once you have all three cake layers, cover the entire cake with a thin crumb coat of icing. Using an offset spatula or long knife, spread another layer of icing onto the cake. In order to get perfectly smooth icing, I used this icing smoother while slowly rotating the stand. 

   To decorate, I pressed Wilton Gold Edible Heart Accents onto the cake, in a gradient going up the sides to mimic champagne bubbles. I then placed the cake on a gold cake board and decorated with gold glitter cake picks. For the cupcakes, I piped a swirl of icing with a 1M tip and sprinkled with the gold hearts. To complete the display, I scattered gold and pink confetti on the table and displayed the beautiful champagne bottle alongside. The cake can be stored in an air-tight container in the refrigerator for up to one week. However, water condensation might make the edible confetti disintegrate into the icing so it's best if the confetti is added shortly before serving.

23 March 2018

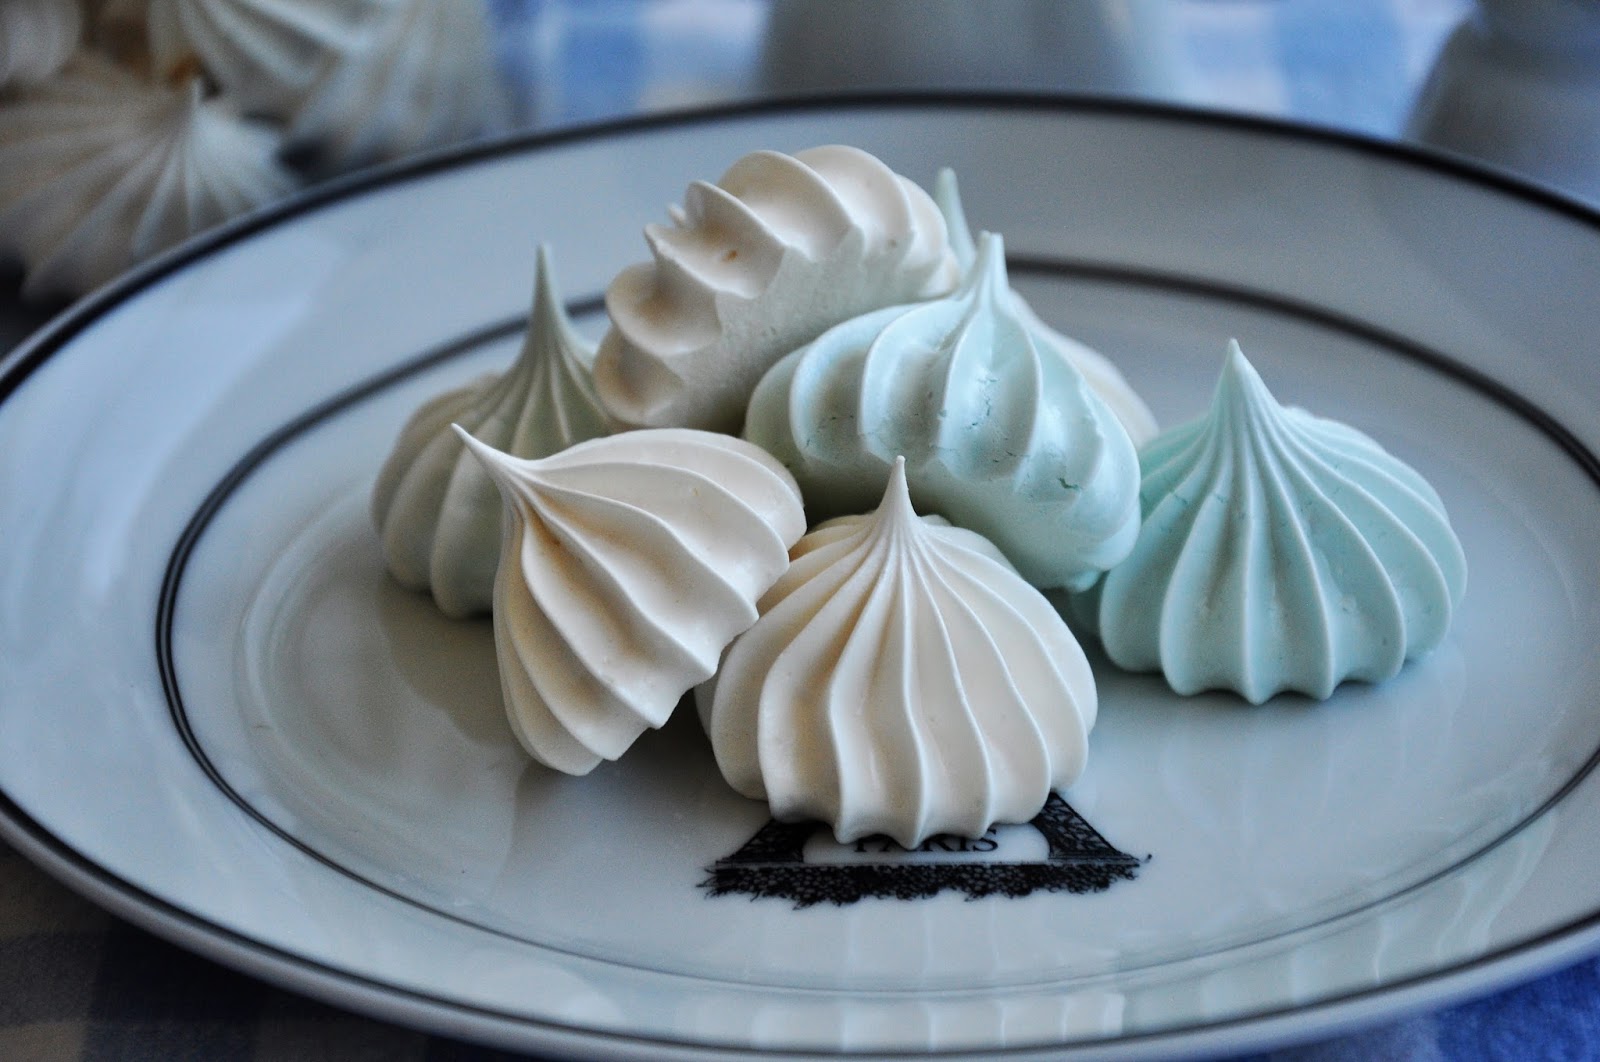
Swiss Meringues


The Art.
    One of the baking projects I wanted to accomplish this winter was to make a beautiful drip cake piled high with macarons, meringues, and candies. The end result was my Candyland Drip Cake and I had a lot of fun putting it together. It was also very intensive, since I wanted to make the meringues and macarons myself. I made a previous post featuring Italian meringues, but this time around I wanted the glossy, delicate shape of Swiss meringues piped with a French tip. The crisp texture and airiness of these cookies accompany tea or coffee perfectly. I suggest making them on a weekend while you are doing your chores, since they require a couple hours in the oven.

The Science.
    The difference between Italian and Swiss meringues is that Italian meringue is beaten at room temperature, whereas Swiss meringue is heated. When egg whites are beaten at high speeds, the albumin protein in the egg whites begins to bind together and aggregate [1]. This traps little air bubbles incorporated by the whisk, making a fluffy meringue. Cream of tartar further aids in the protein aggregation by stabilizing the tangled proteins. In the case of Swiss meringue, the heat provides energy to the aggregation reactions and results in a stiffer meringue with smaller bubbles. 
    I also wanted to share with you an unexpected finding I had regarding food color. The very first batch of meringues I made was dyed with my staple Wilton gel icing colors. I was surprised to find that the blue meringues were cracked and full of large bubbles, while the white ones were fine. Of course, my chemist of a husband took one look at them and said it was because the gel food coloring was cooking up faster than the meringue, causing some parts to shrink rapidly and pull the cookies apart. So, my suggestion to all of you is to use standard liquid food coloring if you want your cookies to come out right!


The Recipe.

Meringue cookies: (Makes 50) 
3 large egg whites
1 tablespoon pure vanilla extract
1/4 teaspoon cream of tartar
3/4 cup superfine granulated sugar
liquid food color (optional)

    Preheat oven to 200°F. Bring a medium saucepan with 1 inch of water to a simmer; this will be the bottom part of your double boiler. Combine all ingredients (except the food color) in a large heat-proof bowl. Place the bowl over the steaming saucepan and whip the egg whites on high speed with a hand mixer for 5 minutes. Be sure to have an oven mitt on the hand that is stabilizing the bowl so the steam doesn't burn you. The meringue should make stiff peaks on your beaters when you pull them out of the bowl. Remove the bowl from the heat and continue to beat on high speed until the meringue cools to room temperature, about 2 minutes. This is when you may whisk in the food color if you wish.
     Cover two baking sheets with parchment paper, sticking the paper down at the corners with a dab of meringue. Spoon meringue into an piping bag fitted with a 6B tip, and pipe 1-inch stars onto the baking sheets, 1/2 inch apart.  Bake 2 hours, switching the top and bottom racks halfway through. After baking, leave cookies in the oven to cool 1 hour with the door held ajar a couple inches with a spoon handle. Meringues can be stored at room temperature in an air-tight container.


1. O Chef, "Beating Egg Whites into Submission." http://www.ochef.com/223.htm

22 March 2018

Candyland Drip Cake

The Art.
    This is my first foray into drip cakes, and I'm kicking myself that it took me so long! I was intimidated by all the beautiful cakes I had seen with bright icing dripping down in perfect little streams, and I imagined that my attempt would either be a runny mess or a clumpy defeat. However, I am happy to report I got it on the first try! You can, too, with the right chocolate and a few easy tricks. My favorite part about drip cakes is that they are usually piled high with other treats, such as these airy Swiss Meringues and Raspberry Macarons. The recipes for these are coming soon as well, so stay tuned!

The Science.
    I did quite a bit of research on the best way to make chocolate ganache before I began, but I was frustrated that everyone had wildly different recipes. In the end I concluded that it comes down to the type of chocolate that you use, and whether you want a more matte ganache like this one, or a shiny one. I used Ghirardelli white chocolate melting wafers for this cake because they taste absolutely amazing and I wanted something that was easy to melt and work with. However, you can use a wide variety of chocolates or melting wafers for your cake. The trick is determining the ratio of chocolate to cream that is best for your particular chocolate. For my Ghirardelli wafers, it was about 3 volumes of chocolate wafers to 1 volume of cream. For harder bar chocolate, like dark chocolate, it will be closer to equal amounts. Unfortunately I can't give a hard and fast rule for this, you will have to take some time to melt your favorite chocolate and play with the ratios until you get it right. This is why you always buy extra chocolate and cream-- in addition to the fact that chocolate does tend to mysteriously disappear when I'm in the room!

The Recipe.

Cake:
   For this cake, I made a 4-layer spice cake using 6x3inch round tins. The recipe for spice cake can be found here. I then leveled the layers flat with a knife and assembled and iced the cake with a batch of buttercream icing. Place the cake in the freezer for at least an hour before you add your drip ganache, so it doesn't stream down the cake too quickly.

Drip Ganache:
6oz. Ghirardelli White Chocolate Melting Wafers
2oz. Heavy Cream

    Combine chocolate and cream in a microwave safe bowl, and microwave in 30 second intervals, stirring between, until just melted. It is important to wait for the ganache to cool slightly before you spoon it onto the cake. It has reached the right temperature when it drips slowly off of your spoon, like thick honey.
    To begin decorating your drip cake, use a teaspoon to pick up some ganache, and slowly pour it onto the cake, about 1/4 inch away from the edge. Stop pouring slightly before the drip reaches the length you want it to be, as it will continue to drip down. Continue to do this at regular intervals around the cake, varying the length of the drips. Finally, use the remaining ganache to flood the top of
 the cake, but be careful not to spill it over the edges.
    To decorate this cake, I used a variety of shapes, textures, and sizes to make a visually interesting pile of sweets. It's very in vogue to place macarons on top of cakes right now, and if you don't have time to make your own you can buy them in most every color to match your desired color scheme. I liked adding the Swiss meringues piped with a French tip because the star shapes provide contrast against the round cookies and candies. It's also always a good idea to have smaller candies that you can use to fill in gaps once you get the big cookies on there. The best part is when you serve the cake and each piece gets an extra treat!