21 December 2013

Chocolate Mice

The Art.
    When we were kids, my mom would wrangle us into helping her make the Christmas treats for our friends and neighbors. This usually involved making trays and trays of the Traditional Greek Baklava that I posted last year, in addition to several hundred candy mice. By the end of the evening, the entire kitchen would be a sticky mess with maraschino cherry juice, and the table would be covered in rows and rows of chocolate mice. This is the first time I've made chocolate mice on my own, and it wasn't nearly as traumatizing. One jar of maraschino cherries will yield approximately 25 mice, which is a manageable number. The entire process took me about an hour and I think the payoff is as cute as can be! Just make sure you store them in a container to keep these creatures from stirring about your house on Christmas Eve.

The Science.
    To make these mice, I used chocolate Almond Bark to coat the cherries. Almond Bark is not chocolate at all, it's mostly composed of palm oil and sugar, with some cocoa powder. Because it doesn't have any cocoa butter, this confection has a higher melting temperature and cools much faster than real chocolate. These qualities make Almond Bark ideal for decorations and candymaking, although the texture and flavor are not quite as good as the real thing.  If you really want to make gourmet chocolate mice and use real chocolate, check out my Burnin' Love Sriracha Truffles post for suggestions.


         While we're on the subject of science, you may have noticed an odd-looking cookie in the photo to the left. It's decorated like a DNA gel, which we use in the lab to determine the genetic makeup of our mice. If you would like to make a genotyping gel cookie for your mice, you can ice a graham cracker with the icing technique I described for my Lemon Polka Dot Sugar Cookies.


The Recipe.

1 jar maraschino cherries, with stems
25 milk chocolate Hershey's Kisses, unwrapped
50 sliced almond pieces, in pairs
2 squares chocolate Almond Bark
royal icing

    Rinse the cherries 3-4 times in water, until the syrup is washed off completely. Lay the cherries out in a single layer on paper towels to dry. Lay out your Hershey Kiss "heads" and match up your almond slice "ears" to prepare yourself for easy assembly. In a small microwave safe bowl, heat the Almond Bark for 30 seconds. If it is not completely melted, stir and heat an additional 30 seconds. Be careful not to overheat it, or it will seize up and harden.
    Pick up a cherry by its stem, dip it into the Almond Bark, then set on waxed paper. Working quickly, attach a Hershey Kiss by pressing it onto the cherry, and insert the almond slivers between the Kiss and the cherry. Almond Bark cools quickly, so you want to have all of the pieces handy. If you need a little extra help, you can use a toothpick to apply more Almond Bark to stick things together. Once all of the mice have cooled, pipe their eyes and noses on with the royal icing. Allow approximately 15 minutes for the icing to dry before serving.

     Chocolate mice can be stored in the refrigerator for one week, or in the freezer for up to 2 months. However, they can be part of a holiday display at room temperature for a couple days without any harm. Get creative with your presentation! These mice can decorate cakes and cupcakes, or reside in a gingerbread house. You can even put them in little truffle wrappers and put them on the boughs of your Christmas tree, if you like.
   

13 December 2013

Maple Bacon Cookie Sandwiches


The Art.
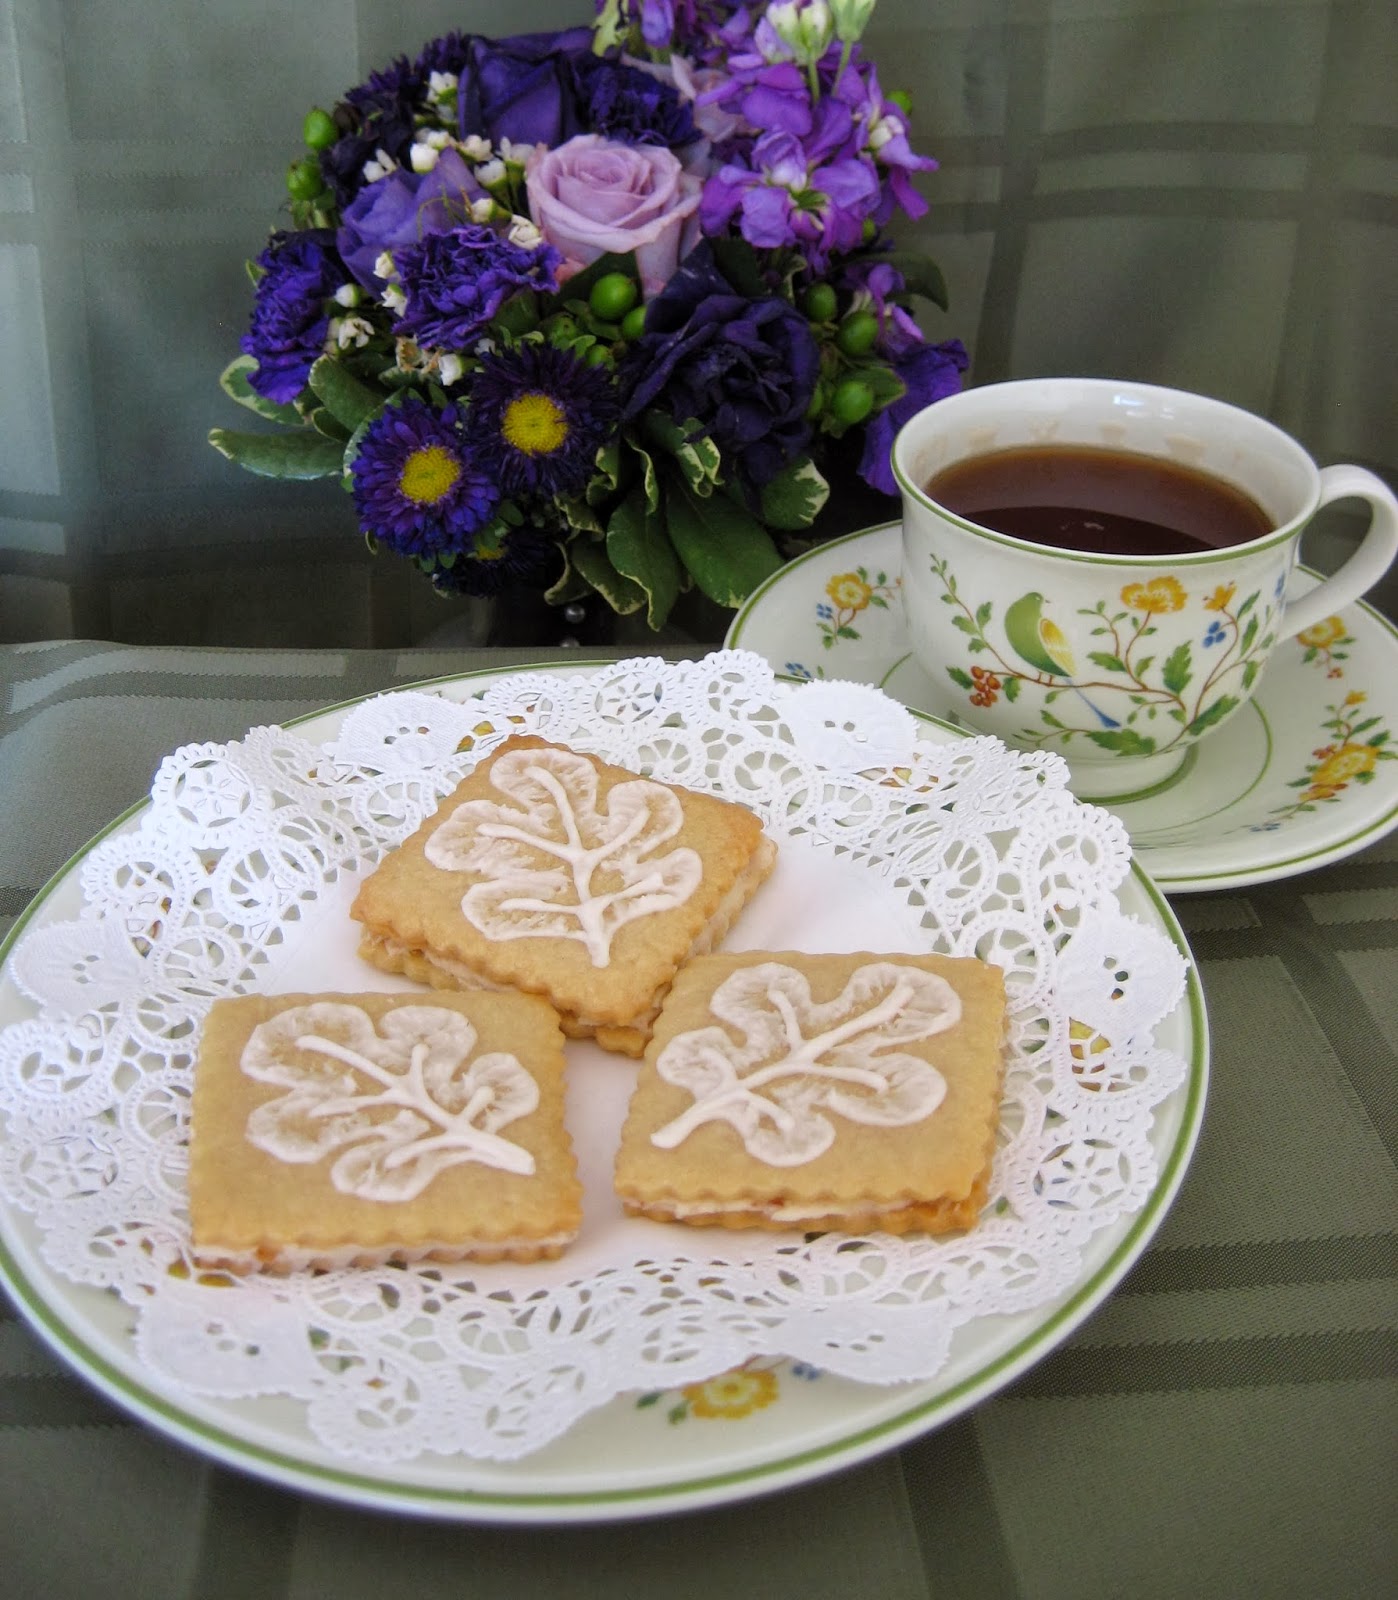
    Whenever I eat a hearty American breakfast, I love to slather my waffles in maple syrup. My plate inevitably becomes a primordial tar pit of tree sap, but I'm ok with that.  I consider it an homage to comfort food and cold weather traditions. I especially make sure to get a little bit of maple syrup on my bacon before I eat it, because all of the flavors and textures complement each other so well--crispy, sticky, sweet, salty. I've wanted to put these flavors in a dessert for a long time, in keeping with my tendency to put bacon in things where it doesn't belong. This time, I combined bacon crumbles and maple syrup into a rich, sweet-and-salty icing, then I sandwiched it between two crisp, buttery sugar cookies. To decorate, I piped some beautiful royal icing leaves on top (I promise they're not as difficult as they look). I recommend enjoying these rich cookies with a hot cup of black tea or coffee.

The Science.
    As if I needed another reason to love it, many studies have found that compounds within maple syrup have beneficial antioxidant properties. A recent study even shows that maple syrup's phenolic compounds can restore normal cell growth in some cancers [1]. However it is with a heavy heart that I tell you that some manufacturers "adulterate" their syrups with beet or cane sugars. These sugars are cheap and readily available, but they are less healthy sugars for the body. Fortunately, a research group in Quebec has developed a very sensitive mass spectrometry method to detect sugar contamination, by measuring the amount of malic acid in the sample and comparing it to the overall sugar content [2]. If certain sugars are more abundant, then the syrup has been sweetened. This detection method can now be used to assure quality control of the maple syrup that we purchase...and slather our bacon in.

The Recipe.

Cookies: Make one batch of square sugar cookies, and one batch of royal icing (recipes here).

Maple Bacon Icing:
2 strips raw bacon
1/2 cup butter, softened
3 cups powdered sugar
2 tablespoons Grade A maple syrup

     Pan fry the bacon until crisp, but not burned. Place it on paper towels until cool, then crumble into small pieces. Pour the bacon fat from the pan through a coffee filter into a small bowl, and chill until solid. In a medium bowl, beat together bacon fat and butter until fluffy. Gradually add powdered sugar while beating until incorporated. Beat in maple syrup and crumbled bacon.

Assembly:
     Once cookies have cooled completely, make cookie sandwiches by spreading the bottom side of a cookie with the maple bacon icing and smooshing it onto another cookie. (Yes, smooshing is a professional baking term.) To make leaf decorations, fill a piping bag with royal icing and add a #3 round tip. Trace the outline of a leaf onto the cookie sandwich. Before the icing dries, lightly pull the icing toward the center of the leaf with a small brush as shown in the photo. Finish the leaf by piping the veins and stem.


    Allow cookies to dry for at least one hour. To show you're a classy hostess, serve cookies on doilies with a cup of hot tea. Cookies can be stored at room temperature in an airtight container for 3 days, or in the freezer for up to 2 months.

1. Gonzalez-Sarrias et al. "Maple polyphenols, ginnalins A-C, induce S- and G2/M-cell cycle arrest in colon and breast cancer cells mediated by decreasing cyclins A and D1 levels." Food Chem., 2013. Vol. 136(2): pp 636-642.
2. Tremblay, P and Paquin, R. "Improved Detection of Sugar Addition to Maple Syrup Using Malic Acid as Internal Standard and in 13C Isotope Ratio Mass Spectrometry (IRMS)" J. Agric. Food Chem., 2007. Vol. 55(2): pp 197-203.

13 November 2013

Pumpkin Spice Cake

 The Art.
    Let's just take a minute and think about the first person who decided to eat a pumpkin. Now, this pumpkin is as hard as a rock, a crazy orange color, and the insides smell funny and are full of stringy guts. Not to mention the fact that you have to cook it for hours before it's edible. This was an adventurous individual indeed. But let's not forget that we have him to thank for pumpkin pie, pumpkin spice lattes, and of course, pumpkin cake.
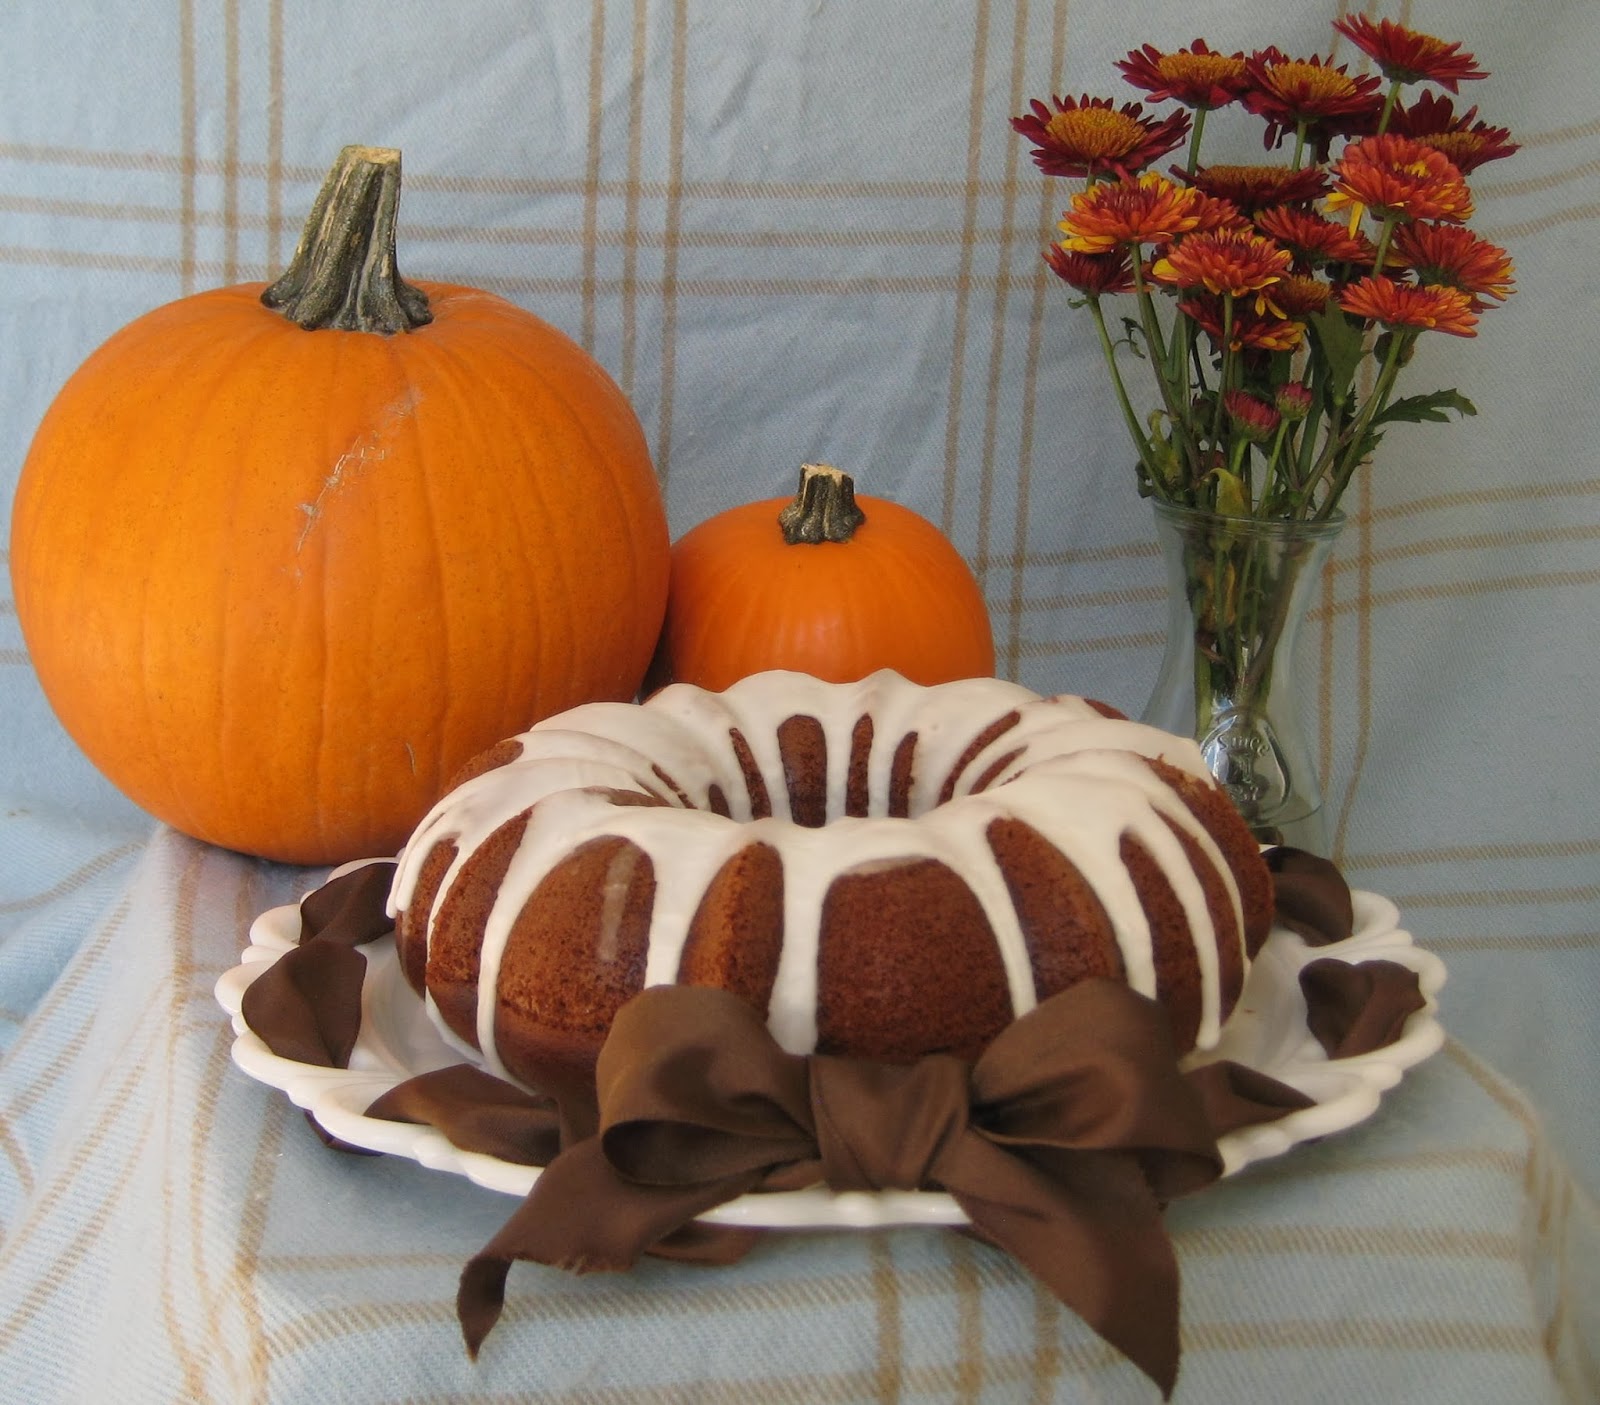
    Unlike our Johnny Pumpkinseed friend, I was feeling lazy when I was creating this recipe, so I made it a bundt cake. The laziest of all cakes, it doesn't require decorating and you don't even have to wait for it to cool before drizzling the glaze on top. This is perfect for a holiday dinner when you're behind on the cooking. You can let it bake during your meal and then smugly carry a warm cake out of the kitchen like it's no big deal.

The Science.
    At first, I had a hard time making this cake with a robust pumpkin flavor. I used my Orange Gingerbread Cake as a basis for my recipe, replacing the molasses with an equal volume of pumpkin. This produced a cake with a wonderful texture, but I thought I could give it more oomph. If I added more canned pumpkin to give it a really strong flavor, there was too much moisture in the cake and it became gummy. After many taste tests from my friends, I began to realize that people were associating the spices in the cake with pumpkin flavor, and the actual pumpkin didn't have much to do with it at all.
    I did some research, and found that this is caused by two factors. The first is that cinnamon has a very strong flavor, and our tastebuds are saturated by it very quickly. Cinnamaldehyde is the compound that gives cinnamon its pungent, spicy flavor, and it stimulates the same taste receptors as hot peppers [1]. We can taste very low concentrations of cinnamaldehyde, but we cannot differentiate any increase in flavor past 0.5mg/mL [1]. The significance of this is that the cinnamon in the cake is so pungent that it largely overwhelms the pumpkin flavor. Secondly, we have been psychologically conditioned over time to associate cinnamon flavor with the holiday season, so this flavor is more strongly correlated to fall treats than actual pumpkin [2]. So in the end, all I needed to do was use more spices in the cake, rather than increase the amount of pumpkin.

The Recipe.

Cake:
2 1/2 cups all purpose flour
1 teaspoon baking powder
1 teaspoon baking soda
1 teaspoon salt
1/2 teaspoon cinnamon
1/4 teaspoon allspice
1/4 teaspoon nutmeg
1 1/2 cups sugar
1/2 cup vegetable oil
3 eggs
3/4 cup canned pumpkin
3/4 cup buttermilk

    Preheat oven to 350oF. Coat a bundt pan with baking spray. Mix dry ingredients in a large bowl. In a medim bowl, beat together sugar, vegetable oil, eggs, and pumpkin on medium speed. Alternately beat in flour mixture and buttermilk, and beat just until smooth. Pour batter into pan and bake on center rack 45 minutes, or until tester comes out clean. Cool in pan 10 minutes, then invert onto wire rack.


Glaze:
1 1/2 cups powdered sugar
1/4 cup ginger ale

    Combine sugar and ginger ale in a small bowl. Drizzle over warm cake and serve immediately.

    To give your tablescape an appropriate autumnal feel, you can litter it with chrysanthemums, pumpkins, and other gourds. Perhaps some fall ambiance will aid in the psychological conditioning that our flavors are dependent on.


1. Yokomi, N. and Ito, M. "Influence of composition upon the variety of tastes in Cinnamomi Cortex." Journal of Natural Med., 2009. Vol. 63(3): pp261-266.
2. Seo, H et al. "Odor attributes change in relation to the time of the year. Cinnamon odor is more familiar and pleasant during Christmas season than summertime." Appetite, 2009. Vol. 53(2): pp222-225.

19 October 2013

Chrysanthemum Carrot Cake


The Art.
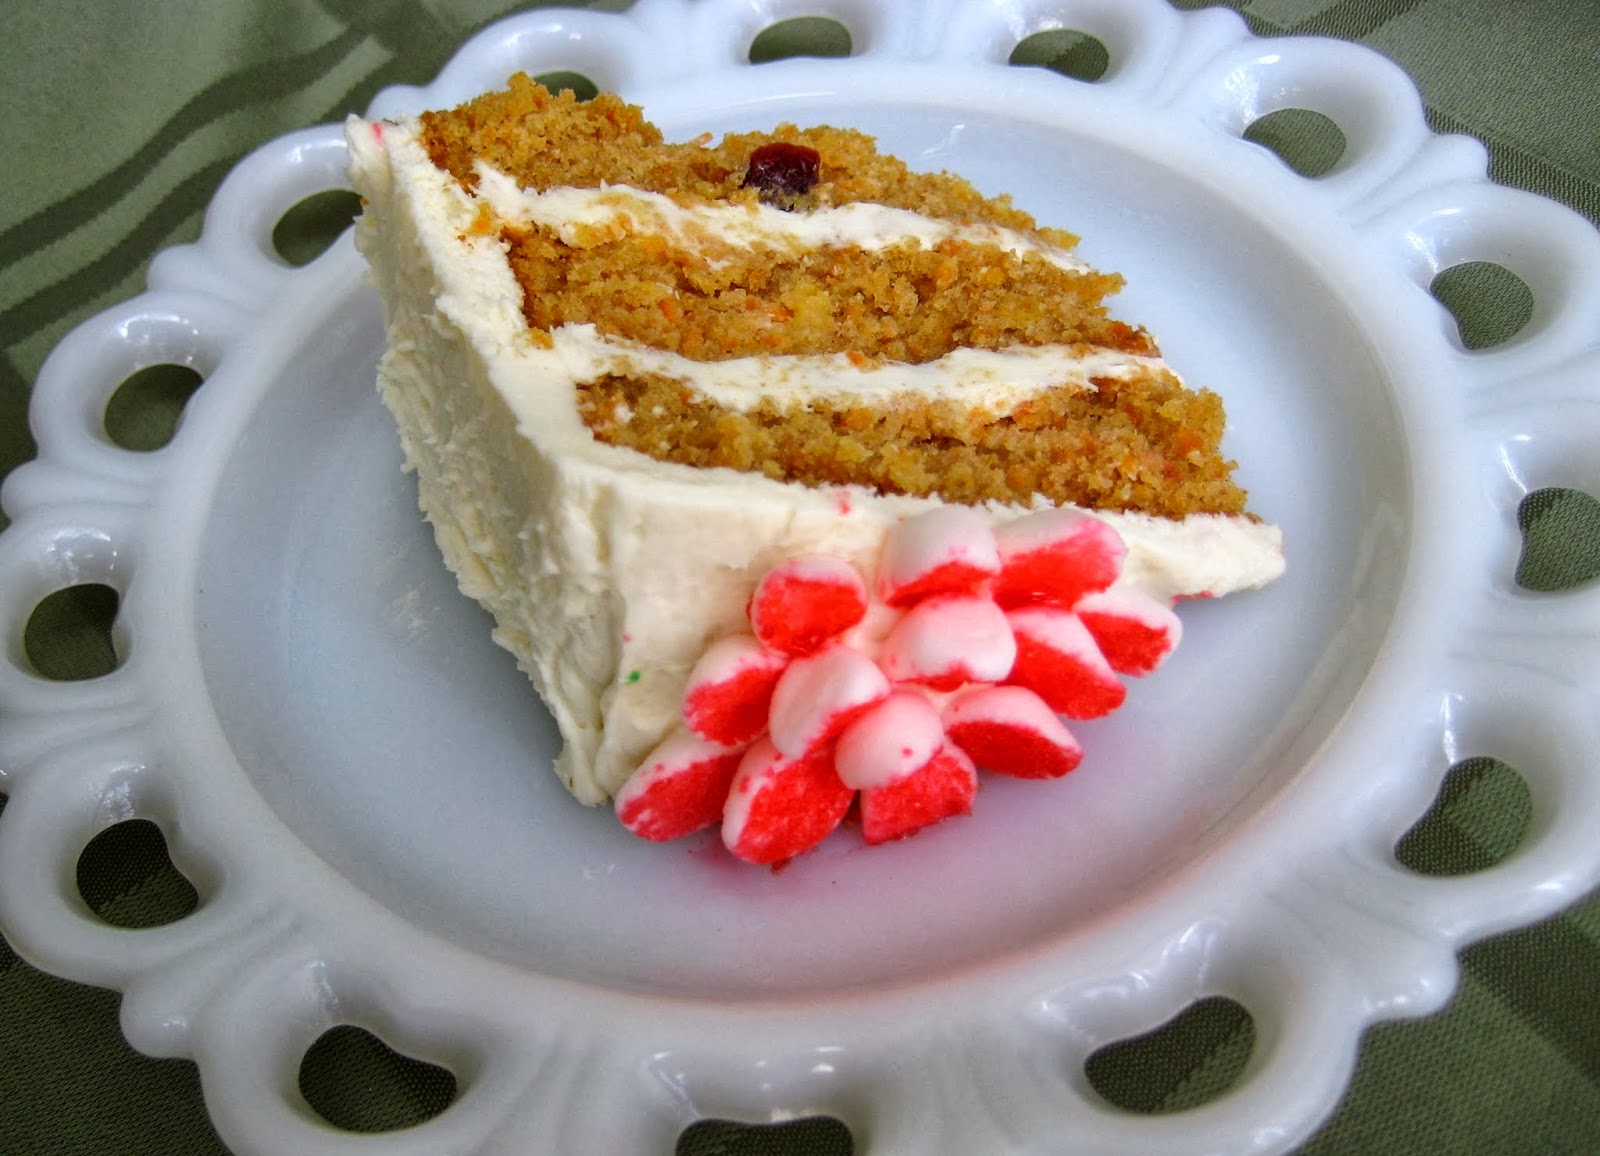
    I'm so glad that someone clever invented carrot cake, otherwise I would never finish a bag of carrots. I know there are people who don't like carrot cake very much, but I think this is because most of them are too sweet. What I love about this recipe is that it has pineapple and dried cranberries instead of raisins, adding a more tart-sweet flavor that doesn't overwhelm. Instead of going with the standard buttercream carrot decoration, I thought this cake looked cute with some simple marshmallow chrysanthemum flowers.


The Science.
    Another interesting fact about this cake recipe is that it doesn't require milk. Instead, undrained canned pineapple provides the moisture needed for the batter. The pineapple juice also provides an acidic component, which reacts with the baking powder to create carbon dioxide bubbles and make the cake rise. The high number of eggs gives the cake just enough sponginess to hold the delicate, moist crumb together.

The Recipe.

Cake:
2 cups sifted flour
3 teaspoons baking powder
1 teaspoon salt
2 teaspoons cinnamon
1 1/2 cups vegetable oil
2 cups sugar
4 eggs
2 cups finely grated carrots
8.25oz canned crushed pineapple, with juice
1/2 cup dried cranberries
3/4 cup chopped nuts

    Preheat oven to 350°F. Coat 3 8-inch round cake pans with cooking spray and line with parchment paper. (For instructions on how to do this, visit the Almond Nutella Cake post.) In a medium bowl, combine flour, baking powder, salt, and cinnamon. Beat oil, sugar, and eggs in a large bowl until combined. Add dry ingredients and beat on medium speed for 2 minutes. Fold in carrots, pineapple, cranberries, and nuts. Pour batter into cake pans and bake on center rack for 30 minutes, or until tester come out clean. Cool in pan for 10 minutes, then cool completely on wire racks. Meanwhile, make the icing and marshmallows.

Cream cheese icing:
16 oz. cream cheese, room temperature
1/2 cup salted butter, room temperature
1 1/2 cups powdered sugar
1 teaspoon vanilla extract
decorating sugar
mini marshmallows

    Beat cream cheese and butter on medium speed until fluffy. Gradually add powdered sugar while mixing. Beat in vanilla until combined.
   To make the colored marshmallows, fill three resealable bags each with 1 tablespoon of colored decorating sugar. Cut the marshmallows diagonally with a pair of cooking shears. Place them in the bags with the sugar and shake them until the marshmallows are coated.

Assembly:
     Place a cake layer on a cardboard cake round, and cover with icing. Repeat with the next two layers. Cover the cake with icing, smoothing it with a spatula. Make a dome of icing in the center, on which you will form the center marshmallow flower.

    To make the chrysanthemums, arrange marshmallows in concentric rings, from the outside in. For this pattern, I made a larger flower in the center and smaller ones on the sides. Of course, you can make any pattern you like. Maybe you can take inspiration from all the chrysanthemums that are blooming right now!

20 September 2013

Teatime Tiramisu

 The Art.
    One of the reasons I will never be a real adult is because I don't drink coffee. I assume that real grown-ups stand around in suits, slurping coffee and talking about portfolios and stuff. The best I can do in that regard is sit around in my jeans with a cup of tea and talk about Science. However, while adulthood continues to evade my grasp, I do consider myself a professional tea drinker. When I brew  a cup it is a delicate process that involves loose-leaf tea, thermometers, timers and different protocols for each one to produce a perfect tea that is flavorful, but not bitter. 
    It is my love for tea that inspired me to make this Teatime Tiramisu. By replacing the espresso with English Breakfast tea, the flavor of the cake becomes lighter and smoother, but no less complex. Adding lemon to the cream makes the cake reminiscent of a cup of tea with a twist of lemon. The brandy and Riesling also give it a hint of alcohol, which combines with the black tea and lemon to create a very unique flavor that is earthy, tart, and delicately sweet. This cake can be served at teatime with a pot of tea, or after dinner with the remaining Riesling (assuming you didn't drink it all while the cake was chilling).

The Science.
    English Breakfast is a black tea, which means that it is made from tea leaves that have been withered and fermented. Depending on what region the tea leaves are grown in and how they are treated, black teas can have a variety of different flavors and aromas. The compounds that give tea its aroma are broadly classified as phenols and flavonoids. A Japanese research group has determined that the "sweet" flavors in some more full-bodied black teas are imparted by epoxydecenals that are produced by the fermentation process, and are not found in green tea [1]. Moreover, another group has found that length of brewing time and addition of milk can affect how much of these aromatic compounds our bodies absorb from drinking tea [2]. This, in turn, may affect how well the tea we drink will provide health benefits, such as prevention of diabetes and cancer [2]. For the highest concentration of antioxidant compounds, the group recommends steeping black tea for 7 minutes, however I have always found that it is less bitter with a 5 minute brew time. I suppose you'll just have to choose whether you want a smooth cup of tea or more antioxidants.

The Recipe.

Syrup:
2 cups boiling-hot water
5 English Breakfast teabags
3 tablespoons sugar
3 tablespoons brandy

Cake:
juice from 2 lemons
1 teaspoon gelatin
4 egg yolks
1/3 cup Riesling
1/2 cup sugar
1 pound mascarpone
1 cup 40% heavy cream
1 tablespoon lemon zest
36 biscotti savoiardi (lady fingers)

    Steep tea in hot water for 10 minutes. Add sugar and brandy and stir until dissolved, then set aside.  Sprinkle gelatin over the lemon juice and allow to bloom for 5 minutes in a large bowl. Be sure to use a glass bowl, because a metal one will give the lemon juice a metallic taste. Meanwhile, set a saucepan with 1 inch of water on the stovetop to simmer. Once the gelatin is bloomed, add the egg yolks, Riesling, and sugar, then set over the saucepan to make a double boiler. Beat the mixture on medium speed while it heats for 5 minutes, until it is frothy and tripled in size. Remove from heat and fold in the mascarpone, then place in the fridge. 
 
    To whip the cream, prechill a metal bowl and beaters in the freezer for 10 minutes. Place the bowl over an ice bath and whip the cream on medium speed until stiff peaks form. Be careful not to over-whip and curdle the cream. Fold the whipped cream and the lemon zest into the mascarpone mixture.
    Assemble the cake by dipping the savoiardi in the tea syrup, then layering them in the bottom of a 9x13 glass dish. Cover with 1/2 of the cream mixture. Add another layer of soaked cookies, then top with the rest of the cream. Refrigerate for at least 4 hours before serving. 
     For a beautiful garnish, you can make lemon peel curls as I instructed in the Orange Gingerbread Bundt Cake post. They're a very easy way to dress up this beautiful dessert!
1. Kumazawa, K. et al. "Characterization of Epoxydecenal Isomers as Potent Odorants in Black Tea (Dimbula) Infusion." Journ. of Agri. and Food Chem., 2006. Vol. 54 (13), pp 4795–4801.
2. Kyle, J. et al. "Effects of Infusion Time and Addition of Milk on Content and Absorption of Polyphenols from Black Tea." Journ. of Agri. and Food Chem., 2007. Vol 55 (12), pp 4889–4894.


05 September 2013

Raspberry Cobbler


The Art.
    My sister is in college, and she recently complained to me that all the recipes I post are too complicated for her to make. I feel kind of bad about that, so this post is dedicated to my sister, and all the other college students who would like to take a stab at baking. Thinking back to my college days, I realized that this meant I needed to make a recipe that was idiot-proof and didn't require a mixer. With this goal in mind, I created something affordable, easy, and (most importantly) delicious. Since raspberries are in season right now, you can probably get them very cheap--I got mine for $1 a carton. If fresh berries are out of your budget, frozen ones will do just fine. This recipe also only requires 10 minutes of active time, so you can cram 30 minutes of studying in while it bakes. Nothing motivates a good study session like the reward of raspberry cobbler!

The Science.
    Since raspberries have a high water content, the filling in this recipe calls for tapioca. I have to admit, before I made my first fruit dessert I thought tapioca was just a type of pudding. In reality, tapioca is a starchy root that is derived from the cassava plant, and is used as a thickening agent in baked goods. Tapioca is ideal for thickening because it is a type 3 starch, which means it has long chains of sugars that intertwine with each other when they are heated [1]. This interaction between the sugar chains gives tapioca its gelatinous properties. In fact, the cassava plants that we harvest tapioca from today contain very high levels of the enzymes that produce starches, called starch synthases. This is partly due to human selection as we domesticated the plant, but also because of a natural mutation that occurred evolutionarily in cassava, duplicating the gene that encodes starch synthase [2].


The Recipe.

Filling:
24oz fresh raspberries
2 tablespoons sugar
1 teaspoon tapioca

Crust:
1 cup flour
1/2 cup sugar
1 teaspoon baking powder
6 tablespoons butter, cut into pieces
1/4 cup buttermilk
zest from 1 lemon

      Preaheat oven to 425°F. Mix filling ingredients and pour into an 8x6in. or 8x8in. glass dish, then set aside. In a medium bowl, combine flour and sugar. Add butter, and crumble with fingers until the mixture is uniform and similar to cornmeal. Stir in buttermilk and lemon zest. Drop dough by spoonfuls over the raspberry mixture, and bake on center rack for 30 minutes, until crust is golden brown. Allow to cool 10 minutes before serving. 

1. Vamadevan, V et al. "Impact on molecular organization of amylopectin in starch granules upon annealing." Carbohydr. Polym, 2013. Vol. 98 (1), pp1045-55.
2.  Yang, Z et al. "Molecular evolution and functional divergence of soluble starch synthase genes in cassava (manihot esculenta crantz)." Evol. Bioinform. Online, 2013. Vol. 9, pp239-49.

20 August 2013

Orange Creme Cake


The Art.
    I'm proud to present this light, summery cake to you, because I think we can all use more orange desserts in our lives. I spent the last couple months developing this recipe, and what it has taught me is that I am an absolute food snob. I tried to get inspiration from other recipes online, but I was horrified at what popped up when I searched for "orange creamsicle cake." All of the recipes were disgusting combinations of instant desserts layered into a pile of Diabetes and Regret. I was not about to feed any of that sludge to anybody. Why do people bother with these things when you can whip up a beautiful whipped cream in 5 minutes? So, instead of Cool Whip, pudding, Jell-O, or any other variety of distasteful fillings, I set out to make a wholesome orange mousse for the cake. I layered this with my newly developed white cake that I debuted with the Cadbury Cupakes as the most moist, fluffy cake in the world. That may be an exaggeration, but you'll see where I'm coming from once you taste it yourself. Besides, who can resist a cake garnished with pretty orange slices?

The Science.
    Like most of my recipes, this one took quite a bit of R&D to get it just right. The first time I made the orange mousse, I used a recipe that combined a creamy orange custard with beaten egg whites [1]. This mousse had a wonderful, creamy flavor, but wouldn't hold up at room temperature and slid out the sides of the cake when I cut it. I decided that I needed a fluffier, more sturdy mousse to go between my cake layers. Then I found a recipe from America's Test Kitchen for a Greek yogurt lemon mousse [2]. This recipe seemed promising for two reasons: 1) the egg whites were beaten over a double boiler, making them more stable by forming bonds between the egg proteins, and 2) it used more gelatin. I replaced the Greek yogurt with whipped cream and the lemon flavor with orange, and it was almost perfect. The next time I made it, I whipped some cornstarch into the whipped cream to hold things together. Corn starch interacts with both the water and the fat in the cream, holding them in suspension and preventing a watery separation from forming. I also added more gelatin, bloomed in the orange juice, to give the mousse a firmer texture and help it stand up to the cake layers.

The Recipe.

Orange Creme Mousse:
1/3 cup juice from 1 orange
1 1/2 teaspoons gelatin
3/4 cup heavy whipping cream
1/2 teaspoon cornstarch
1/8 teaspoon salt
3 egg whites, room temperature
1/3 cup sugar
1/4 teaspoon cream of tartar
1 teaspoon vanilla
1 1/2 tablespoons grated orange zest

    Combine orange juice and gelatin in a small bowl to bloom. Beat the cream on medium speed in a large bowl. To keep the cream cold, set the bowl over an ice bath, and use chilled beaters. When soft peaks form, beat in the cornstarch and continue to whip until stiff peaks form. Place whipped cream in fridge.
    In another bowl, combine salt, egg whites, sugar, cream of tartar, and vanilla. Add orange juice/gelatin mixture. Set over a saucepan with 1 inch of simmering water to create a double boiler, so you can gently cook the egg whites as you whip them. Beat mixture over the double boiler for 5 minutes, then remove from heat and beat until cool, about 2 minutes. Fold in orange zest and the whipped cream, then refrigerate while making the cake.

White Cake:
6 egg whites, divided
1 1/2 cups sugar, divided
2 1/4 cups cake flour
3 teaspoons baking powder
3/4 cup salted butter
2 teaspoons vanilla
1 1/3 cup buttermilk

    Preheat oven to 350°F. Coat 3 8-inch round pans with baking spray and line with parchment paper. In a medium bowl, beat three egg whites on medium speed until frothy. Gradually beat in 1/2 cup sugar and continue to beat until soft peaks form. Set aside. Sift together flour and baking powder in another bowl. In a large bowl, beat together remaining cup sugar, butter, remaining egg whites, and vanilla. Alternately add one third of the flour mixture and buttermilk, beating between each addition just until combined. Fold in beaten egg whites with a spatula. Spoon batter into pans and smooth the tops with a spatula. Bake on center rack for 20 minutes, or until tester comes out clean. Cool 10 minutes in pan, then invert onto wire racks to cool completely.

Stabilized Whipped Icing:
Make a half batch of the whipped icing from the Oreo Ice Cream Cake post.

Assembly:
    Place one cake layer upside down on a cardboard cake round. Cover with 1/2 of the orange mousse, spreading to the edges with a spatula. Place the second cake layer on top, then cover with the rest of the mousse. Top with the last cake layer, and spread the whipped icing on top. Run a spatula around the edges of the cake to smooth out the mousse. Garnish with an orange slice and refrigerate until serving.

1. http://press.uchicago.edu/Misc/Chicago/470269_recipe4.html
2. Editors at America's Test Kitchen. The Best of America's Test Kitchen, 2011. Brookline, MA: America's Test Kitchen, 2010.