27 March 2014

Art Deco Cake


 The Art.
    Each year, one of my classiest friends hosts a Repeal of Prohibition Party. We all dress in 30's-inspired garb, make some Sidecars, and get slightly "swacked," as they would say. I'm not what you would call a master mixologist, so I mixed something up in my kitchen instead. I was inspired by the art deco architecture of the 1930's, and came up with this tiered Art Deco Cake. I discovered that tiered cakes can be fun, as long as you put a little planning into it. Taking extra time to ensure that all your edges are squared away really pays off here. Covering the cake with purchased fondant gives it smooth, clean lines, and I attached a feather half hackle on top for extra fancy.

The Science.
    This was my first tiered cake, and I wanted to make sure that I had nice, flat cake layers to stack up. As I've discussed before, some cakes tend to "crown" in the center, giving them a domed shape that is difficult to layer with. Crowning happens when the edges of the cake heat up faster than the center, so the water evaporates before the steam can help the edges rise. This can be alleviated by using light-colored cake pans, which absorb less heat in the oven. Some bakers swear by wrapping the sides of the cake pan with strips of cloth to insulate it, but that's a little too intense for me. I decided to try another tool at my disposal: the convection setting on my oven. This setting activates a fan within the oven that circulates the hot air, so the surface of the cake is exposed to more even temperatures. I tried convection baking this cake, and I was very pleased with the results. My cakes were nice and flat, and I didn't have uneven baking on the side of the cake that was near the oven wall. I guess you could say I'm a Convection Convert. (Ah! I'm hilarious!) Remember, if you find your cake layers have crowned despite your best efforts, you can always press them down as I show in the Fall Spice Cake post.

The Recipe.

Chocolate Cake:
    Preheat oven to 350°F. For the chocolate cake, make a double batch of the cake recipe from the Chocolate Turtle Cake post. Coat two 9x13 pans with baking spray and line with parchment paper. Pour the batter into the cake pans and bake on center rack for 30 minutes, or until tester inserted in center comes out clean. Cool cakes on wire racks.
      To cut out the tiers, make three square stencils with cardstock. I made mine 6.5in, 4.5in, and 3in square. Use the stencils to cut three squares out of the cake layers with a sharp, serrated knife.

    Make a batch of vanilla buttercream icing, and use it to layer your cake tiers, as shown below. Place the largest tier on a cake board and cover it with icing. Following the instuctions from the Valentine Cake post, cover the bottom tier with rolled fondant. Repeat with the other two tiers, and carefully lay them on top, smoothing the fondant afterward.

     To make the black accents, I tinted the remaining fondant with Wilton Icing Colors Black by kneading it into the fondant. (I highly recommend wearing gloves for this, black fingernails are never becoming.) Then, roll the fondant out and cut strips for the cake, affixing them with buttercream. This is a good time for careful measuring, as well as artfully disguising any unsightly wrinkles or tears in the white fondant. You can get creative with any other accents you want to add. I chose to add a geometric fan shape to the bottom tier. Finally, I attached the feather accent (from Hobby Lobby) by cutting slits into the fondant on the top tier and inserting the half hackle into it.
    The cake was a great success at the party, and I was pleased with the way it turned out. Getting all of the edges straight proved to be more challenging here than with the rounded Valentine Cake I made previously, but nobody seemed to notice the uneven parts. Remember, you are your harshest critic and even if you don't think it looks perfect, everyone else will be impressed.

04 March 2014

Mardi Gras Cupcakes


The Art.
    Happy Mardi Gras, everyone! I have a special treat for you today, in the spirit of fun and extravagance. When I was shopping for gold sprinkles for these cupcakes, I came across these amazing Wilton Colorburst Batter Bits. So, in keeping with the revelry of the Mardi Gras parade, I decided to put confetti in my cupcakes. I bought green, orange, and purple, then baked them into my yellow cake batter, to show off the colors. I really love how it turned out, especially after adorning my cake stand with coordinating beads.

The Science.
    Today, many people will be indulging themselves in all the foods they're giving up for Lent tomorrow (unless you're Greek Orthodox, in which case your fast started on Monday). Thus, the goal of these cupcakes is to be the last hurrah for all those pious souls who want to binge on their favorite sweets before Ash Wednesday. My decorating technique is exactly what is needed, apparently, as people are more likely to consume a higher number of sweets if there is a visual variety [1]. I guess they just have to taste them all to make sure they're equally good. Furthermore, making your foods look prettier makes them more appetizing to consumers, who clearly favor sensory appeal over other considerations, like price and nutrition [2]. Certainly, the entire experience of eating delicious foods--sight, smell, texture, taste--is alluring to everyone. Some research groups go as far to say that there is such a thing as "food addiction," saying that overindulging in naughty foods causes a brain response similar to drug addiction [3]. Of course, this is difficult to prove since we all need to eat. But, there is no denying that the experience of indulging in foods has a hold on all of us, which is why the greatest sacrifice we make for Lent is denying ourselves tasty cupcakes.

The Recipe.
    To make these cupcakes, click these links for the yellow cake cupcakes and vanilla buttercream icing recipes. Remember to fold the batter bits into your cake batter before pouring it into your cupcake pans. 
       To decorate these cupcakes, I took a similar approach as I did for the Quick Birthday Cupcakes, dying my icing three different colors and using different tips and patterns to create unique designs. I used Wilton Icing Colors Violet, Kelley Green, and Golden Yellow to tint my icing. 
I then piped the purple and green with 1M star tips, and the yellow with an 18 star tip. You can experiment with different colors and tips as you choose, to give your cupcakes your own flair. Of course, what Mardi Gras cupcakes would be complete without gold sugar sprinkles!

    These cupcakes are fancy inside and out, with festive frosting on top and colorful confetti on the inside. In case you're not giving up sweets for Lent, you can store these cupcakes at room temperature for a few days, or put them in the freezer until Lent is over. 

1.  Rolls, Barbara et al. "How sensory properties of foods affect feeding behavior." Physiology and Behavior, 1982. Vol. 29(3): pp 409-417.
2.   Jauregui-Lobera, I and Bolano Rios, P. "What motivates consumer's food choice?" Nutrición Hospitalaria, 2011. Vol. 26(6): pp 1313-1321.
3. Pandit, R et al. "Dietary Factors Affect Food Reward and Motivation to Eat." Obesity Facts, 2012. Vol. 20(2): pp 221-242.

14 February 2014

Valentine Cake


The Art.
    As you may recall from my posts last year, Valentine's Day is one of my favorite holidays. I apparently had a lot of time on my hands around then, which I used to make truffles, petite fours, corset cookies, and the stunning Roses are Red Cake. This year I've been busier than usual, so I'll try to make up for lack of quantity with quality. This particular cake is simple and cute, with fondant decorations covering a rich chocolate cake with strawberry icing. This is the first time I've used fondant to cover a cake, and I'm pretty happy with the result. Since I was in a time crunch, I opted to purchase rolled fondant, made by Wilton. I was impressed by how easy it was to work with, and it tasted much better than I had expected. Using Valentine cookie cutters to make pink fondant decorations was fast and easy, and made this cake look very sweet.

The Science.
    One of the things we have come to expect from Valentine's day treats is that they should have a deep chocolate flavor. I love this cake recipe because it gives you a wonderfully moist, chocolatey flavor, but doesn't require you to shell out $30 on Ghirardelli chocolate and spend and entire afternoon smashing it to bits and blending it with milk. Rather, I use Hershey's Special Dark cocoa, which is more affordable. Instead of just mixing it in with the dry ingredients, I "bloom" the cocoa in hot water before stirring it into the cake batter, reconstituting the cocoa solids and enhancing their chocolate flavor in the final product. For those of you considering splurging on Ghirardelli brand cocoa powder, I refer you to America's Test Kitchen's taste test results, which found that it was not worth the extra cash.


 The Recipe.

Chocolate cake:
1 cup sugar
1 cup flour
3/4 teaspoon baking powder
3/4 teaspoon baking soda
1/2 teaspoon salt
1/2 cup boiling water
1/3 cup dark cocoa
1 egg
1/2 cup milk
1/4 cup vegetable oil
1 teaspoon vanilla extract


       Preheat oven to 350oF and adjust rack to center position. Coat two heart-shaped pans (or two 8" round pans) with baking spray, and line with parchment paper (see the Almond Nutella Cake for step-by-step instructions). Combine sugar, flour, baking powder, baking soda, and salt in a medium bowl. In a small bowl, dissolve cocoa in boiling water to allow it to "bloom." In a large bowl, beat together egg, milk, oil, and vanilla. Add dry ingredients and beat on medium speed for 2 minutes. Stir in bloomed cocoa. Pour batter into prepared pan, and bake 30 minutes, or until tester inserted into center of cake comes out clean.  Cool in pan for 10 minutes, then invert onto wire racks and peel off parchment paper to cool completely.

Strawberry Buttercream:
1 cup salted butter, room temperature
1 cup vegetable shortening
1/4 cup strawberry jam
5-7 cups powdered sugar
2 teaspoons vanilla

    In large bowl, beat together butter and shortening on medium speed until fluffy. Add strawberry icing, and beat until combined. Beat in powdered sugar, one cup at a time. Add sugar until icing makes stiff, jagged peaks. Beat in vanilla. If icing tastes too sugary or grainy, add a couple tablespoons of milk.

Assembly:
     Lay first cake layer on a cardboard cake round, and cover with icing. Place second cake layer on top of the first, and ice the entire cake. Set cake aside while you prepare the rolled fondant.


    Dust a large work surface and rolling pin with powdered sugar. Remove fondant from package and work in your hands until it is pliable. Form half of the fondant into a ball and place on work surface. Cover the remaining fondant to prevent it from drying out. Roll fondant out with rolling pin, lifting and rotating often to prevent sticking to the surface, until 1/4-inch thick. To transfer it to your cake, fold the rolled fondant over your rolling pin, center it over the cake, then lay it over the top. Smooth first with your hands, then with a fondant smoother. Press into the bottom edge of the cake, then cut off the excess with a pizza cutter.
    For the decorations, I dyed the remaining fondant pink with Wilton icing colors by kneading the dye into the icing, then rolling out as before. Cut a 1/2-inch strip for the bottom of the cake, and affix it to the cake with buttercream. Use either cookie cutters or a sharp knife to cut out any other decorations you wish. You can personalize these decorations for your very special Valentine.
    This cake should be kept covered at room temperature for a couple days, or in the freezer for up to one month.

21 January 2014

Mouse Cake


The Art.
    A few weeks ago, I made these cute Chocolate Mice. I had 50 of them to work with, so after using them to reenact "Desperate Mousewives" in my gingerbread houses and pranking people in the lab, I decided to put them on my sister's birthday cake. This was simple enough, except for the fact that my sister lives 900 miles away in Colorado. So, I baked up some cake layers and took them to the airport, planning to assemble them with rosy pink icing once I got there. Everyone at airport security lost it when they saw the chocolate mice, but they all assumed that the undecorated cake was wheels of cheese. I concluded that this was a much more ingenious decorating idea, and so I decorated it as you see it now. This cake probably has the highest cute:difficulty ratio of anything I've ever made, and I have the unusually friendly TSA agents to thank for it.

The Science.
    Some of you may be asking, "Why didn't you just bake the cake when you got to Colorado, and avoid the hassle?" That is a very good question, and the answer is one that I give quite bitterly, as a baker who lived in Colorado for two decades. While this climate is great for generating breathtaking landscapes, skiing, and rock climbing, the high altitude of my home state made it nearly impossible for me to bake cakes. This is due to the fact that the atmosphere is thinner, which lowers the boiling point of the water within cake batter. As Susan Purdy explains in her book, Pie in the Sky, water vapor leaving cake batter at low temperatures can cause cakes to have a coarse texture, "fall," and inhibit browning [1]. There are adjustments you can make to recipes to compensate for high altitudes, but each cake is different and can require its own tweaking. I have spent so much of my time perfecting my cake recipes at sea level the past few years, I was not about to go and try my luck on the Mount Doom of cakes. The simplest way for me to bring my sister a cake that had a moist, fine texture was for me to bake it in my own kitchen.

The Recipe.
    For this cake, you can follow the directions for my fluffy white cake recipe and vanilla buttercream. I used 6"x3" round pans, so I had batter left over to make some cupcakes. Before icing the cake, I cut a small sliver out of one of the layers, to make it look like a cheese wheel that had been cut. I used Wilton icing colors Yellow and Orange to tint the icing a cheesy yellow. You may tint your icing differently, depending on what type of cheese you want your cake to look like.  Finally, I arranged the chocolate mice around the cake, and finished it off with chocolate sprinkle "droppings." The cake can be stored at room temperature for a few days, or frozen in an airtight container for up to one month.

1. Purdy, Susan. Pie in the Sky: Successful Baking at High Altitudes. New York, NY: William Morrow Cookbooks, 2005.

21 December 2013

Chocolate Mice

The Art.
    When we were kids, my mom would wrangle us into helping her make the Christmas treats for our friends and neighbors. This usually involved making trays and trays of the Traditional Greek Baklava that I posted last year, in addition to several hundred candy mice. By the end of the evening, the entire kitchen would be a sticky mess with maraschino cherry juice, and the table would be covered in rows and rows of chocolate mice. This is the first time I've made chocolate mice on my own, and it wasn't nearly as traumatizing. One jar of maraschino cherries will yield approximately 25 mice, which is a manageable number. The entire process took me about an hour and I think the payoff is as cute as can be! Just make sure you store them in a container to keep these creatures from stirring about your house on Christmas Eve.

The Science.
    To make these mice, I used chocolate Almond Bark to coat the cherries. Almond Bark is not chocolate at all, it's mostly composed of palm oil and sugar, with some cocoa powder. Because it doesn't have any cocoa butter, this confection has a higher melting temperature and cools much faster than real chocolate. These qualities make Almond Bark ideal for decorations and candymaking, although the texture and flavor are not quite as good as the real thing.  If you really want to make gourmet chocolate mice and use real chocolate, check out my Burnin' Love Sriracha Truffles post for suggestions.


         While we're on the subject of science, you may have noticed an odd-looking cookie in the photo to the left. It's decorated like a DNA gel, which we use in the lab to determine the genetic makeup of our mice. If you would like to make a genotyping gel cookie for your mice, you can ice a graham cracker with the icing technique I described for my Lemon Polka Dot Sugar Cookies.


The Recipe.

1 jar maraschino cherries, with stems
25 milk chocolate Hershey's Kisses, unwrapped
50 sliced almond pieces, in pairs
2 squares chocolate Almond Bark
royal icing

    Rinse the cherries 3-4 times in water, until the syrup is washed off completely. Lay the cherries out in a single layer on paper towels to dry. Lay out your Hershey Kiss "heads" and match up your almond slice "ears" to prepare yourself for easy assembly. In a small microwave safe bowl, heat the Almond Bark for 30 seconds. If it is not completely melted, stir and heat an additional 30 seconds. Be careful not to overheat it, or it will seize up and harden.
    Pick up a cherry by its stem, dip it into the Almond Bark, then set on waxed paper. Working quickly, attach a Hershey Kiss by pressing it onto the cherry, and insert the almond slivers between the Kiss and the cherry. Almond Bark cools quickly, so you want to have all of the pieces handy. If you need a little extra help, you can use a toothpick to apply more Almond Bark to stick things together. Once all of the mice have cooled, pipe their eyes and noses on with the royal icing. Allow approximately 15 minutes for the icing to dry before serving.

     Chocolate mice can be stored in the refrigerator for one week, or in the freezer for up to 2 months. However, they can be part of a holiday display at room temperature for a couple days without any harm. Get creative with your presentation! These mice can decorate cakes and cupcakes, or reside in a gingerbread house. You can even put them in little truffle wrappers and put them on the boughs of your Christmas tree, if you like.
   

13 December 2013

Maple Bacon Cookie Sandwiches


The Art.
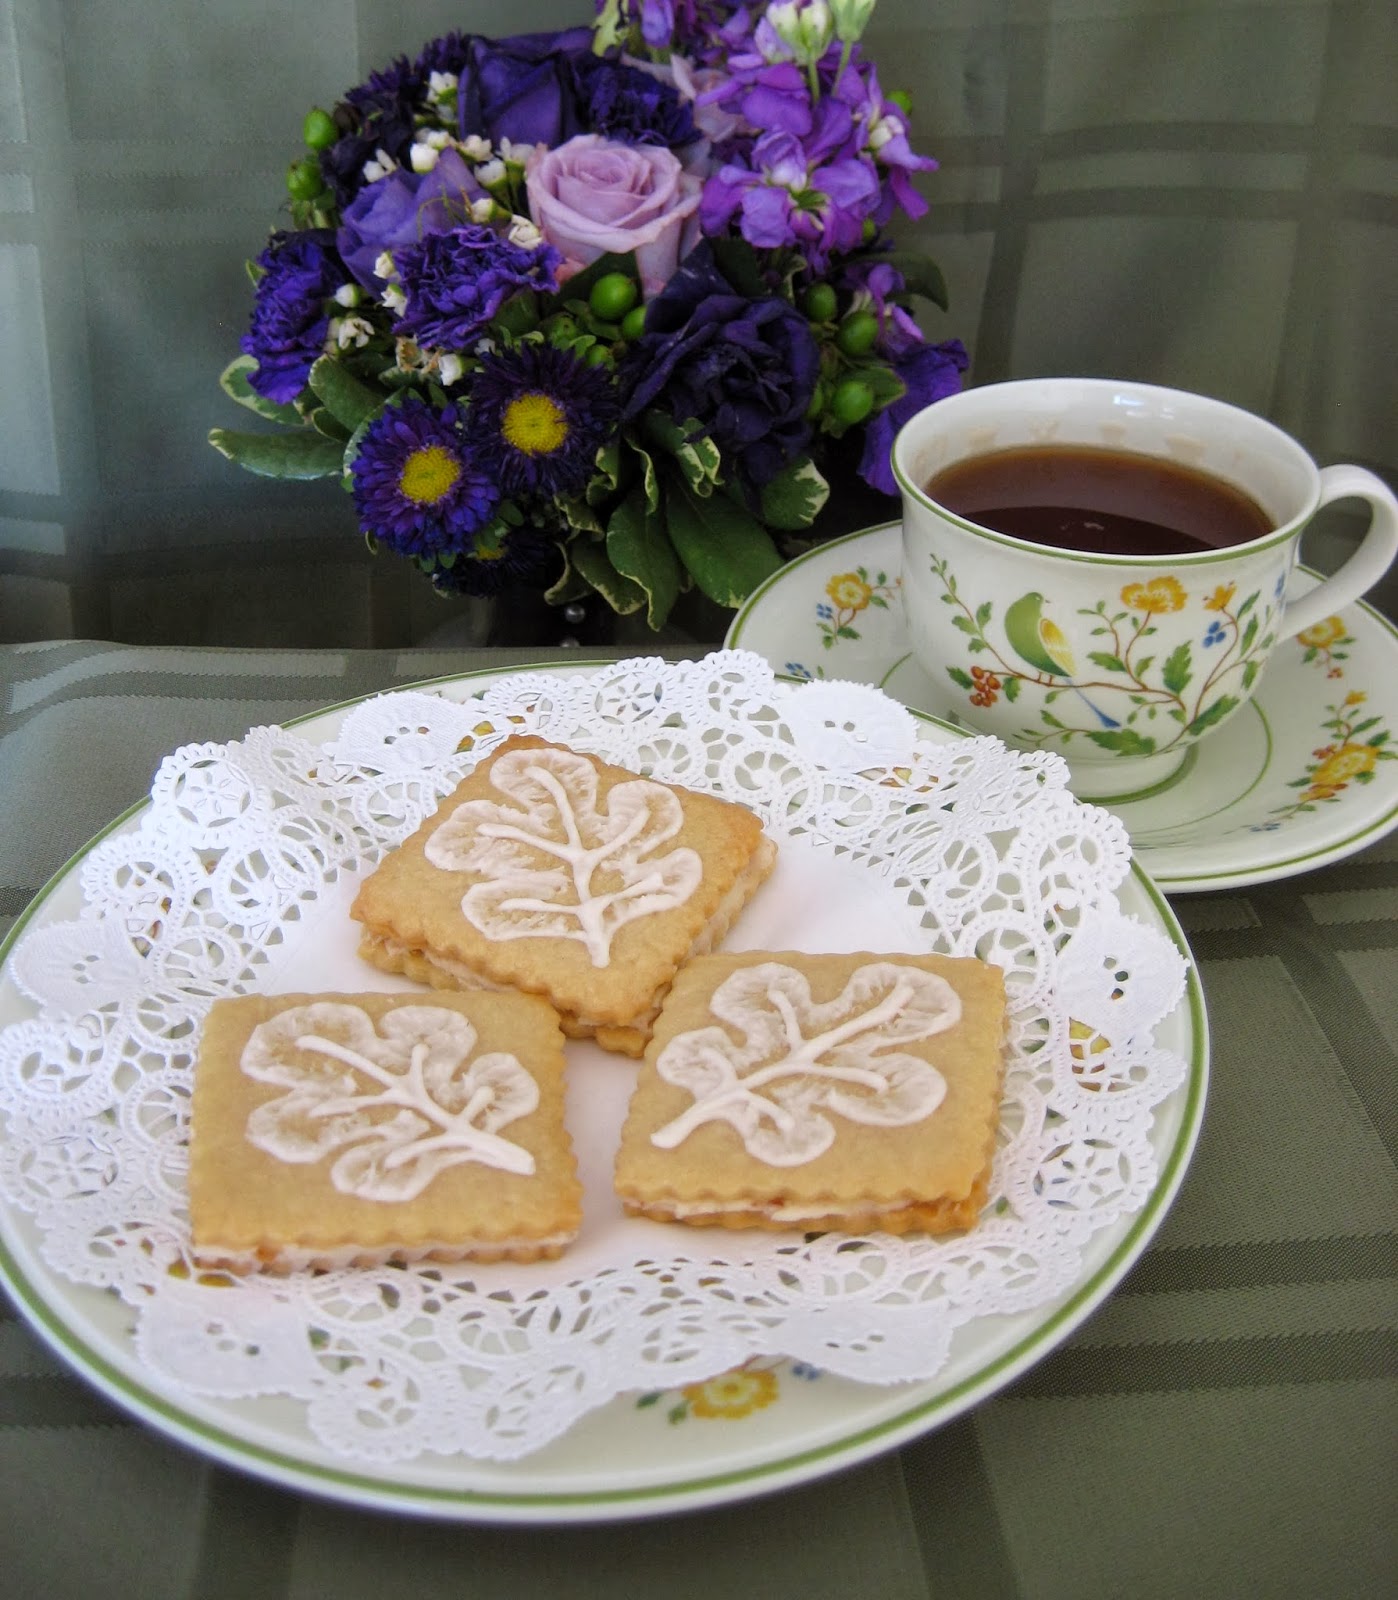
    Whenever I eat a hearty American breakfast, I love to slather my waffles in maple syrup. My plate inevitably becomes a primordial tar pit of tree sap, but I'm ok with that.  I consider it an homage to comfort food and cold weather traditions. I especially make sure to get a little bit of maple syrup on my bacon before I eat it, because all of the flavors and textures complement each other so well--crispy, sticky, sweet, salty. I've wanted to put these flavors in a dessert for a long time, in keeping with my tendency to put bacon in things where it doesn't belong. This time, I combined bacon crumbles and maple syrup into a rich, sweet-and-salty icing, then I sandwiched it between two crisp, buttery sugar cookies. To decorate, I piped some beautiful royal icing leaves on top (I promise they're not as difficult as they look). I recommend enjoying these rich cookies with a hot cup of black tea or coffee.

The Science.
    As if I needed another reason to love it, many studies have found that compounds within maple syrup have beneficial antioxidant properties. A recent study even shows that maple syrup's phenolic compounds can restore normal cell growth in some cancers [1]. However it is with a heavy heart that I tell you that some manufacturers "adulterate" their syrups with beet or cane sugars. These sugars are cheap and readily available, but they are less healthy sugars for the body. Fortunately, a research group in Quebec has developed a very sensitive mass spectrometry method to detect sugar contamination, by measuring the amount of malic acid in the sample and comparing it to the overall sugar content [2]. If certain sugars are more abundant, then the syrup has been sweetened. This detection method can now be used to assure quality control of the maple syrup that we purchase...and slather our bacon in.

The Recipe.

Cookies: Make one batch of square sugar cookies, and one batch of royal icing (recipes here).

Maple Bacon Icing:
2 strips raw bacon
1/2 cup butter, softened
3 cups powdered sugar
2 tablespoons Grade A maple syrup

     Pan fry the bacon until crisp, but not burned. Place it on paper towels until cool, then crumble into small pieces. Pour the bacon fat from the pan through a coffee filter into a small bowl, and chill until solid. In a medium bowl, beat together bacon fat and butter until fluffy. Gradually add powdered sugar while beating until incorporated. Beat in maple syrup and crumbled bacon.

Assembly:
     Once cookies have cooled completely, make cookie sandwiches by spreading the bottom side of a cookie with the maple bacon icing and smooshing it onto another cookie. (Yes, smooshing is a professional baking term.) To make leaf decorations, fill a piping bag with royal icing and add a #3 round tip. Trace the outline of a leaf onto the cookie sandwich. Before the icing dries, lightly pull the icing toward the center of the leaf with a small brush as shown in the photo. Finish the leaf by piping the veins and stem.


    Allow cookies to dry for at least one hour. To show you're a classy hostess, serve cookies on doilies with a cup of hot tea. Cookies can be stored at room temperature in an airtight container for 3 days, or in the freezer for up to 2 months.

1. Gonzalez-Sarrias et al. "Maple polyphenols, ginnalins A-C, induce S- and G2/M-cell cycle arrest in colon and breast cancer cells mediated by decreasing cyclins A and D1 levels." Food Chem., 2013. Vol. 136(2): pp 636-642.
2. Tremblay, P and Paquin, R. "Improved Detection of Sugar Addition to Maple Syrup Using Malic Acid as Internal Standard and in 13C Isotope Ratio Mass Spectrometry (IRMS)" J. Agric. Food Chem., 2007. Vol. 55(2): pp 197-203.

13 November 2013

Pumpkin Spice Cake

 The Art.
    Let's just take a minute and think about the first person who decided to eat a pumpkin. Now, this pumpkin is as hard as a rock, a crazy orange color, and the insides smell funny and are full of stringy guts. Not to mention the fact that you have to cook it for hours before it's edible. This was an adventurous individual indeed. But let's not forget that we have him to thank for pumpkin pie, pumpkin spice lattes, and of course, pumpkin cake.
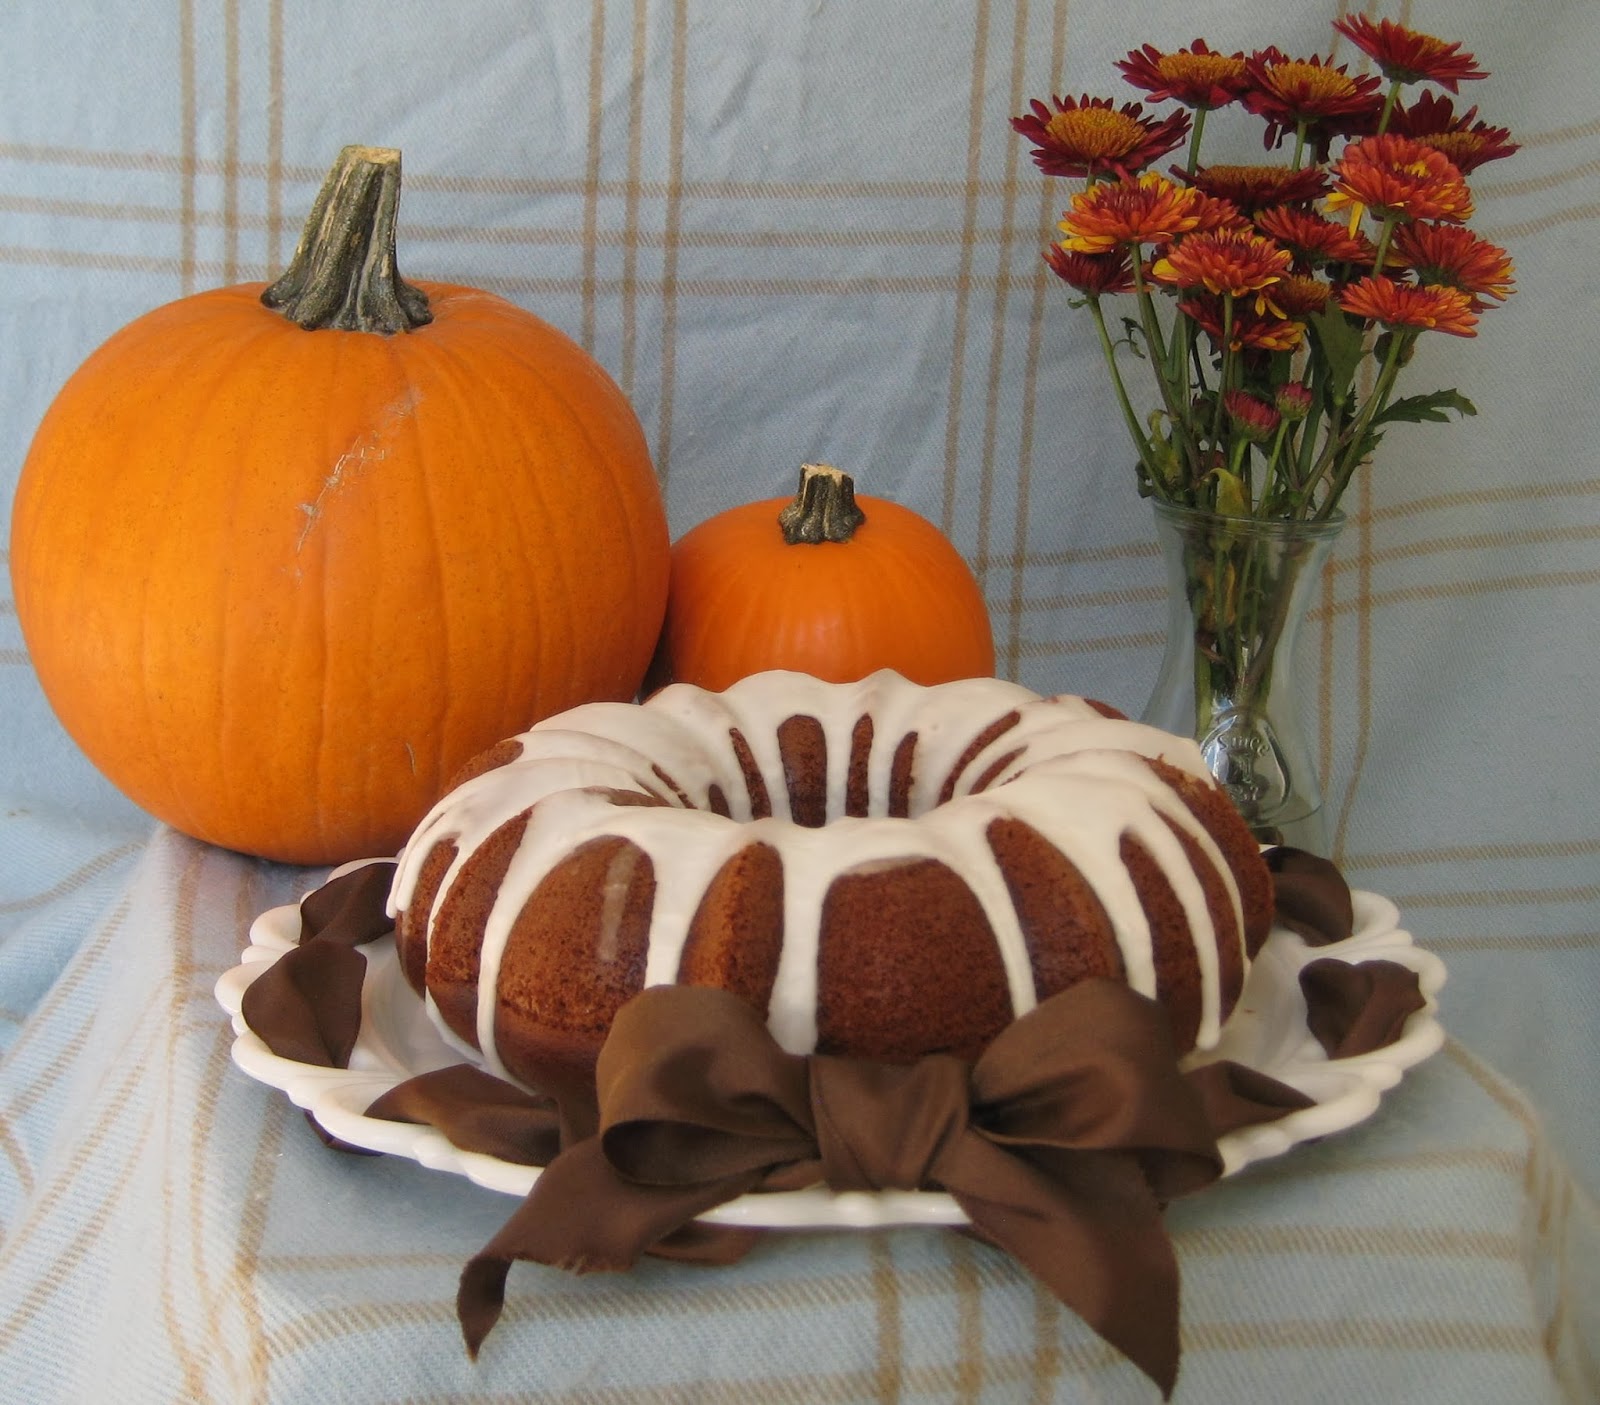
    Unlike our Johnny Pumpkinseed friend, I was feeling lazy when I was creating this recipe, so I made it a bundt cake. The laziest of all cakes, it doesn't require decorating and you don't even have to wait for it to cool before drizzling the glaze on top. This is perfect for a holiday dinner when you're behind on the cooking. You can let it bake during your meal and then smugly carry a warm cake out of the kitchen like it's no big deal.

The Science.
    At first, I had a hard time making this cake with a robust pumpkin flavor. I used my Orange Gingerbread Cake as a basis for my recipe, replacing the molasses with an equal volume of pumpkin. This produced a cake with a wonderful texture, but I thought I could give it more oomph. If I added more canned pumpkin to give it a really strong flavor, there was too much moisture in the cake and it became gummy. After many taste tests from my friends, I began to realize that people were associating the spices in the cake with pumpkin flavor, and the actual pumpkin didn't have much to do with it at all.
    I did some research, and found that this is caused by two factors. The first is that cinnamon has a very strong flavor, and our tastebuds are saturated by it very quickly. Cinnamaldehyde is the compound that gives cinnamon its pungent, spicy flavor, and it stimulates the same taste receptors as hot peppers [1]. We can taste very low concentrations of cinnamaldehyde, but we cannot differentiate any increase in flavor past 0.5mg/mL [1]. The significance of this is that the cinnamon in the cake is so pungent that it largely overwhelms the pumpkin flavor. Secondly, we have been psychologically conditioned over time to associate cinnamon flavor with the holiday season, so this flavor is more strongly correlated to fall treats than actual pumpkin [2]. So in the end, all I needed to do was use more spices in the cake, rather than increase the amount of pumpkin.

The Recipe.

Cake:
2 1/2 cups all purpose flour
1 teaspoon baking powder
1 teaspoon baking soda
1 teaspoon salt
1/2 teaspoon cinnamon
1/4 teaspoon allspice
1/4 teaspoon nutmeg
1 1/2 cups sugar
1/2 cup vegetable oil
3 eggs
3/4 cup canned pumpkin
3/4 cup buttermilk

    Preheat oven to 350oF. Coat a bundt pan with baking spray. Mix dry ingredients in a large bowl. In a medim bowl, beat together sugar, vegetable oil, eggs, and pumpkin on medium speed. Alternately beat in flour mixture and buttermilk, and beat just until smooth. Pour batter into pan and bake on center rack 45 minutes, or until tester comes out clean. Cool in pan 10 minutes, then invert onto wire rack.


Glaze:
1 1/2 cups powdered sugar
1/4 cup ginger ale

    Combine sugar and ginger ale in a small bowl. Drizzle over warm cake and serve immediately.

    To give your tablescape an appropriate autumnal feel, you can litter it with chrysanthemums, pumpkins, and other gourds. Perhaps some fall ambiance will aid in the psychological conditioning that our flavors are dependent on.


1. Yokomi, N. and Ito, M. "Influence of composition upon the variety of tastes in Cinnamomi Cortex." Journal of Natural Med., 2009. Vol. 63(3): pp261-266.
2. Seo, H et al. "Odor attributes change in relation to the time of the year. Cinnamon odor is more familiar and pleasant during Christmas season than summertime." Appetite, 2009. Vol. 53(2): pp222-225.