20 August 2013

Orange Creme Cake


The Art.
    I'm proud to present this light, summery cake to you, because I think we can all use more orange desserts in our lives. I spent the last couple months developing this recipe, and what it has taught me is that I am an absolute food snob. I tried to get inspiration from other recipes online, but I was horrified at what popped up when I searched for "orange creamsicle cake." All of the recipes were disgusting combinations of instant desserts layered into a pile of Diabetes and Regret. I was not about to feed any of that sludge to anybody. Why do people bother with these things when you can whip up a beautiful whipped cream in 5 minutes? So, instead of Cool Whip, pudding, Jell-O, or any other variety of distasteful fillings, I set out to make a wholesome orange mousse for the cake. I layered this with my newly developed white cake that I debuted with the Cadbury Cupakes as the most moist, fluffy cake in the world. That may be an exaggeration, but you'll see where I'm coming from once you taste it yourself. Besides, who can resist a cake garnished with pretty orange slices?

The Science.
    Like most of my recipes, this one took quite a bit of R&D to get it just right. The first time I made the orange mousse, I used a recipe that combined a creamy orange custard with beaten egg whites [1]. This mousse had a wonderful, creamy flavor, but wouldn't hold up at room temperature and slid out the sides of the cake when I cut it. I decided that I needed a fluffier, more sturdy mousse to go between my cake layers. Then I found a recipe from America's Test Kitchen for a Greek yogurt lemon mousse [2]. This recipe seemed promising for two reasons: 1) the egg whites were beaten over a double boiler, making them more stable by forming bonds between the egg proteins, and 2) it used more gelatin. I replaced the Greek yogurt with whipped cream and the lemon flavor with orange, and it was almost perfect. The next time I made it, I whipped some cornstarch into the whipped cream to hold things together. Corn starch interacts with both the water and the fat in the cream, holding them in suspension and preventing a watery separation from forming. I also added more gelatin, bloomed in the orange juice, to give the mousse a firmer texture and help it stand up to the cake layers.

The Recipe.

Orange Creme Mousse:
1/3 cup juice from 1 orange
1 1/2 teaspoons gelatin
3/4 cup heavy whipping cream
1/2 teaspoon cornstarch
1/8 teaspoon salt
3 egg whites, room temperature
1/3 cup sugar
1/4 teaspoon cream of tartar
1 teaspoon vanilla
1 1/2 tablespoons grated orange zest

    Combine orange juice and gelatin in a small bowl to bloom. Beat the cream on medium speed in a large bowl. To keep the cream cold, set the bowl over an ice bath, and use chilled beaters. When soft peaks form, beat in the cornstarch and continue to whip until stiff peaks form. Place whipped cream in fridge.
    In another bowl, combine salt, egg whites, sugar, cream of tartar, and vanilla. Add orange juice/gelatin mixture. Set over a saucepan with 1 inch of simmering water to create a double boiler, so you can gently cook the egg whites as you whip them. Beat mixture over the double boiler for 5 minutes, then remove from heat and beat until cool, about 2 minutes. Fold in orange zest and the whipped cream, then refrigerate while making the cake.

White Cake:
6 egg whites, divided
1 1/2 cups sugar, divided
2 1/4 cups cake flour
3 teaspoons baking powder
3/4 cup salted butter
2 teaspoons vanilla
1 1/3 cup buttermilk

    Preheat oven to 350°F. Coat 3 8-inch round pans with baking spray and line with parchment paper. In a medium bowl, beat three egg whites on medium speed until frothy. Gradually beat in 1/2 cup sugar and continue to beat until soft peaks form. Set aside. Sift together flour and baking powder in another bowl. In a large bowl, beat together remaining cup sugar, butter, remaining egg whites, and vanilla. Alternately add one third of the flour mixture and buttermilk, beating between each addition just until combined. Fold in beaten egg whites with a spatula. Spoon batter into pans and smooth the tops with a spatula. Bake on center rack for 20 minutes, or until tester comes out clean. Cool 10 minutes in pan, then invert onto wire racks to cool completely.

Stabilized Whipped Icing:
Make a half batch of the whipped icing from the Oreo Ice Cream Cake post.

Assembly:
    Place one cake layer upside down on a cardboard cake round. Cover with 1/2 of the orange mousse, spreading to the edges with a spatula. Place the second cake layer on top, then cover with the rest of the mousse. Top with the last cake layer, and spread the whipped icing on top. Run a spatula around the edges of the cake to smooth out the mousse. Garnish with an orange slice and refrigerate until serving.

1. http://press.uchicago.edu/Misc/Chicago/470269_recipe4.html
2. Editors at America's Test Kitchen. The Best of America's Test Kitchen, 2011. Brookline, MA: America's Test Kitchen, 2010.

12 August 2013

Blueberry Cake Batter Pancakes


The Art.
    Breakfast food is hands down my most favorite food of all. I think I could give Ron Swanson a pretty good run for his money when it comes to loving eggs and sausage. Of course, pancakes and waffles have a special place in my heart, too. But if we're being perfectly honest, I have always been disappointed with the texture of the pancakes I make at home, compared to the amazing pancakes you can get at a diner. They somehow manage to simultaneously be fluffy, dense, and moist all at the same time. None of that rubbery stuff that you flip in your frying pan at home. I so desperately wanted to make a pancake of the hometown diner caliber, I sank into one of my Baking Depressions. Then, I had an epiphany: what if I used my fluffy cake batter to make pancakes? If it makes such a wonderfully light, moist cake, shouldn't it make a great pancake? And indeed, this was the case. I know for sure I'll never make any other pancakes again. These cake batter pancakes have the perfect, fluffy texture I was after, and are delightfully sweet when topped with a fresh blueberry compote.

The Science.
    There are several factors that contribute to the wonderful texture of these pancakes. First, they are made with cake flour which gives a finer, lighter texture. Second, they have a large amount of baking powder, which reacts with the acidity in the buttermilk to create lots of bubbles. And finally, the stiffly beaten egg whites lighten the batter and make the pancakes spongey, rather than dense. Compare this to most pancakes--which are made up of mostly all-purpose flour and baking soda--and it's no mystery why they are worlds apart. This recipe does have one caveat, however: since the cake flour and butter make the pancakes so soft, they are very difficult to flip without breaking. Thus, it is best to make "dollar" pancakes that are smaller, so you can turn them over easily.

The Recipe.

Blueberry Compote:
1 pint fresh blueberries, washed
1/4 cup water
1 tablespoon sugar
pinch salt

    Combine all ingredients in a small saucepan and bring to a boil over medium heat. Continue simmering on low heat, stirring occasionally, for 20 minutes or until reduced to 3/4 cup in volume.

Pancakes:
3 egg whites, divided
1 cup cake flour
1 1/2 teaspoons baking powder
6 tablespoons salted butter
1/2 cup sugar
1 teaspoon vanilla
2/3 cup buttermilk

    In a small bowl, beat 2 egg whites on high speed until soft peaks form, then set aside. Combine flour and baking powder in a medium bowl. In a large bowl, beat together butter, remaining egg white, sugar, and vanilla. Alternately beat in the flour mixture and the buttermilk until combined, scraping down the sides of the bowl occasionally. Fold in the beaten egg whites.
    Heat a griddle or frying pan on medium low heat, and very lightly spray with cooking spray. Pour out 1/4 cup batter to make 4 inch diameter pancakes. When the edges of the batter are covered in bubbles, carefully flip with a spatula and cook 2 minutes longer. Top pancakes with blueberry compote and serve piping hot.


08 August 2013

Oreo Ice Cream Cake


The Art.
    Last summer I attempted to make my very first ice cream cake, which resulted in a literal and metaphorical meltdown that I never want to experience again. As I was standing in the middle of my kitchen frantically scooping up icing that was sliding down the sides of the melting cake, I told myself that there must be a better way. And I'm proud to say that I have found it: I present to you the new and improved Oreo Ice Cream Cake! By baking the chocolate cake layer in a springform pan, then layering the ice cream on top, the cake is manageable and easy to cut. The cake is then covered with a stabilized whipped icing that is simultaneously tasty and insulates the ice cream, and Oreo cookies act as crunchy garnish.

The Science.
    The main problem with the first ice cream cake attempt was that I bought cheap ice cream. Ideally, ice cream should have 10% milk fat in the liquid solution, and once it is frozen it should be 50% air, 30% ice, 15% sugar solution, and 5% fat [1]. Both the milk fat and the air act to insulate the ice cream temperature [2]. The store brand ice cream that I purchased was made with skim milk, stabilizers, and additives that gave the final product a creamy texture and mouthfeel, without having any cream in it. However, without milk fat, this ice cream had a very low melting temperature and would start melting quickly. When making an ice cream cake, you want to use an ice cream that has a high melting temperature, so that it will stay solid longer while you're working with it. For this cake, I perused the frozen dairy isle at the grocery store for the ice cream brand that had the most cream. I was shocked to find that several name brands were actually not ice cream, but "frozen dairy dessert." Most others were made with skim milk, like the one I had previously bought. I finally settled on Blue Bunny, because it had whole milk and cream as the first two ingredients. It was definitely worth taking the time to read the labels, because making and decorating this cake went so much smoother with the high fat ice cream.

The Recipe.

Ice Cream Cake:
1 cup sugar
1 cup flour
3/4 teaspoon baking powder
3/4 teaspoon baking soda
1/2 teaspoon salt
1/2 cup boiling water
1/3 cup cocoa
1 egg
1/2 cup milk
1/4 cup vegetable oil
1 teaspoon vanilla extract
1/2 gallon Blue Bunny Cookies & Cream ice cream
10 Oreo cookies, crushed

    Preheat oven to 350oF and adjust rack to center position. Coat a 10"x 3" springform pan with baking spray. Combine sugar, flour, baking powder, baking soda, and salt in a medium bowl. In a small bowl, dissolve cocoa in boiling water to allow it to "bloom." In a large bowl, beat together egg, milk, oil, and vanilla. Add dry ingredients and beat on medium speed for 2 minutes. Stir in bloomed cocoa. Pour batter into prepared pan, and bake 30 minutes. Cake may be a little soft in the center--this is what makes it easy to cut when frozen. If the cake is crowned, press it flat with a damp paper towel as I showed here. Cool in pan for 2 hours, until room temperature.
    When the cake is cool, thaw the ice cream at room temperature for 15-20 minutes. You want it to be soft enough to spread on top of the cake, but not completely melted. Spread the entire tub of ice cream over the cake, and smooth out with a spatula. Place the cake in the freezer for at least 4 hours, or overnight.

Stabilized Whipped Icing:
2 cups 40% heavy whipping cream
1 teaspoon cornstarch
1/2 cup powdered sugar

    Pre-chill a large metal mixing bowl and your mixer's beating blades in the freezer for 10 minutes. Meanwhile, make an ice bath in a pie plate. Place the bowl on top of the ice bath, and beat the cream in the bowl on medium speed until soft peaks form. Beat in the cornstarch and powdered sugar, and continue to beat until stiff peaks form. Be careful not to whip the cream too fast or too long, or your icing will curdle. The cornstarch acts as a stabilizer and will absorb the water in the cream, so the icing will stay whipped in the refrigerator for several days.

Assembly:
     Take the frozen cake out of the freezer. Run a knife along the edges of the pan to loosen the ice cream, then remove the sides. If your cake layer pulled away from the sides of the pan after it baked, you will have some ice cream that dripped all the way down to the bottom. This is ok, you will still see the layers when you cut the cake.


    With a spatula, spread an even layer of whipped icing all over the top and sides of the cake. Spread the crushed cookies on top. If desired, pipe a border of whipped icing and place a cookie in the center for garnish. Place the cake back in the freezer for at least 30 minutes to set. Let cake sit at room temperature for 15 minutes before serving.


1. Gillies, D and Greenley, K. "ESR/Spin Probe Study of Ice Cream." Journal of Agri. and Food Chem, 2006. Vol. 54 (14), pp 4943–4947.
2. Galvin, Lori et al. Test Kitchen Favorites. Brookline, MA: America's Test Kitchen, 2006.

23 July 2013

Chocolate Turtle Cake

The Art.
     I've been a little obsessed with chocolate turtle flavored things lately. I had a to-die-for turtle fondue the other day, which made me seriously consider getting a chocolate fountain for my kitchen. Because, you know, sometimes you just need turtle fondue for dinner. By yourself. In your pajamas. Since I can't afford a chocolate fountain nor do I want chocolate stains all over my pajamas, I settled with making a turtle cake. I diverged from the standard cake, which can often be covered in a sickening amount of chocolate and caramel syrups. Instead, I put the caramel flavor in a buttercream icing, which separates three moist chocolate cake layers, and topped the cake off with a deliciously bitter dark chocolate ganache. Leaving the sides of the cake open not only allows the beautiful layers to show through, but also decreases the amount of icing, showcasing the richer flavors of the cake.

The Science.
    While I was researching for this post, I came upon a recent study that investigated the chemical components of caramel. As a baker and a scientist, I got so excited I literally squealed at my desk. Since most of you probably don't "nerd out" quite as hard as I do, I'll summarize the findings for you. Caramel is made by heating sugar with butter until it becomes brown and thick, and this change in color and flavor represents a variety of chemical reactions that are occurring within the mixture. In a nutshell, the scientists found that three things happen when sugar turns into caramel: the sugar compounds link together to form long chains of sugars, water is released as a byproduct, and aromatic compounds are created, which give the caramel its distinctive color and smell [1]. Now, a lot of people have trouble making caramel because sugars have a small temperature range within which they caramelize, and above that range they burn. This is why so many fancy candy thermometers and manufactured and sold. However, this caramel icing recipe doesn't require a thermometer, since the ring of bubbles around the edge of the saucepan indicate when the caramel is ready [2].


The Recipe.

Chocolate cake:
2 cups sugar
2 cups flour
1 1/2 teaspoon baking powder
1 1/2 teaspoon baking soda
1 teaspoon salt
1 cup boiling water
1 cup dutch cocoa
2 eggs
1 cup milk
1/2 cup vegetable oil
1 teaspoon vanilla

    Preheat oven to 350°F. Spray 3 8-inch round baking pans with baking spray, and line with waxed paper. If you've never lined cake pans before, see the post for Almond Nutella Cake for pictures. In a medium bowl, combine sugar, flour, baking powder, baking soda, and salt. In a small bowl, dissolve cocoa in boiling water to allow it to "bloom." In a large bowl, beat together egg, milk, oil, and vanilla. Add dry ingredients and beat on medium speed for 2 minutes. Stir in bloomed cocoa. Divide batter equally between the cake pans, and bake on center rack for 20 minutes. Cool cakes in pan for 10 minutes, then invert onto wire racks to cool completely. Once cool, peel off the waxed paper. If your cake layers are "crowned" or rose unevenly, you can press them down as I described here.


Caramel Icing:
1/2 cup salted butter
1 cup brown sugar
1/2 cup 40% heavy cream
1 teaspoon vanilla
2 cups powdered sugar

    Melt butter and brown sugar in a large saucepan over medium heat, stirring constantly. When bubbles form around the edges of the pan, stir in the cream. Continue heating until bubbles form once more. Pour caramel into a large bowl and gradually beat in powdered sugar. Set bowl over an ice bath and continue to beat until cool and fluffy, about 5 minutes.


Chocolate Ganache:
4oz bittersweet bar chocolate
1/4 cup 40% heavy cream
1/4 cup chopped pecans (for topping)

    Place chocolate and cream in a microwave safe bowl.  Gently heat in the microwave for two 30 second intervals, stirring inbetween. Be careful not to overheat the chocolate, or it will seize and you will have to start over. Once the chocolate beings to melt, stir constantly until the cream is completely combined. If it begins to separate, you can add 1 tablespoon of melted butter to bring it back together. Keep ganache slightly warm and spreadable until you are ready to put it on the cake.

Assembly:
    Place the first cake layer upside down on a cardboard cake round. This allows you to frost the underside of the cake, which is flatter and doesn't crumble as much. Using a spatula, cover the cake with one third of the caramel icing in an even layer. Repeat this step for the next two layers.
Top the cake with the ganache, spreading evenly all the way to the edges. Garnish with chopped pecans, and serve!

1. Golon, A and Kuhnert, N. "Unraveling the Chemical Composition of Caramel." Journal of Agrig. and Food Chem. 2012. Vol. 60(12), pp 3266–3274.

2. Galvin, Lori et al. Best of America's Test Kitchen. Brookline, MA: America's Test Kitchen, 2009.


17 June 2013

Pistachio Anise Shortbread Cookies


The Art.
    I hope everyone had a wonderful Father's Day! I wasn't able to spend the holiday with my family, but I did send Dad delicious homemade cookies in the mail. He loves pistachios and anise, so I added both to these buttery shortbread cookies. For pretty packaging, I placed the cookies in jars, painted the lids pistachio green, and tied them off with ribbon. The extra pistachios served as great packing material to ensure that the cookies wouldn't break. Now my dad can relax and enjoy some delicious cookies with his afternoon coffee.

The Science.
    I had never mailed cookies before, and I was determined to make ones that would withstand the elements and arrive intact. I refrained from using any chocolate, because I knew the package would probably get warm. I also wanted the cookies to be sturdy and not crumble, so I settled on shortbread cookies. The fats in the butter and nuts would not go rancid in the heat, and would also aid in holding the cookies together while they were jostling in the mail. A little bit of cornstarch also contributed to the dense texture and reduced crumbling.

The Recipe.

6 tablespoons salted butter, room temperature
1/4 cup brown sugar
1/4 teaspoon almond extract
3/4 cup flour
1 tablespoon cornstarch
1/2 cup chopped pistachios
1/2 teaspoon anise seed

    Preheat oven to 350°F. Combine butter, sugar, and almond extract in a medium bowl, and beat on medium speed until fluffy. Stir in flour and cornstarch until combined. Fold in pistachios and anise. Cover and chill dough 30 minutes.
    Roll dough out 1/2 inch thick, and cut cookies out with 1 1/2 inch round cookie cutter (or with the lip of a champagne flute, as I did with the Strawberry Shortcakes). Place on ungreased cookie sheet and bake for 15-18 minutes, until edges are light golden. Cool completely on wire racks.

29 May 2013

Mini Strawberry Shortcakes

The Art.
    Strawberries are having a wonderful season this year, and whether you take advantage of the discounted cartons at the grocery store or choose to go berry picking, chances are you have a fridge full of strawberries right now. The mild temperatures and plentiful rain we've had in our area has produced some very delicious, sweet fruit, and I wanted to showcase the beautiful berries in a light dessert. Naturally, I made some strawberry shortcakes, but with a fresher twist. I nixed the heavy biscuit and replaced it with my standard yellow cake. These cakes have a springy texture, yet are sturdy enough to stand up to the water content of the strawberries. They are layered with an unsweetened puree of fresh strawberries, and a dollop homemade whipped cream blended with cream cheese. Topping it off with a halved strawberry adds unadulterated fruit flavor and some nice contrasting color provided by the leaves.
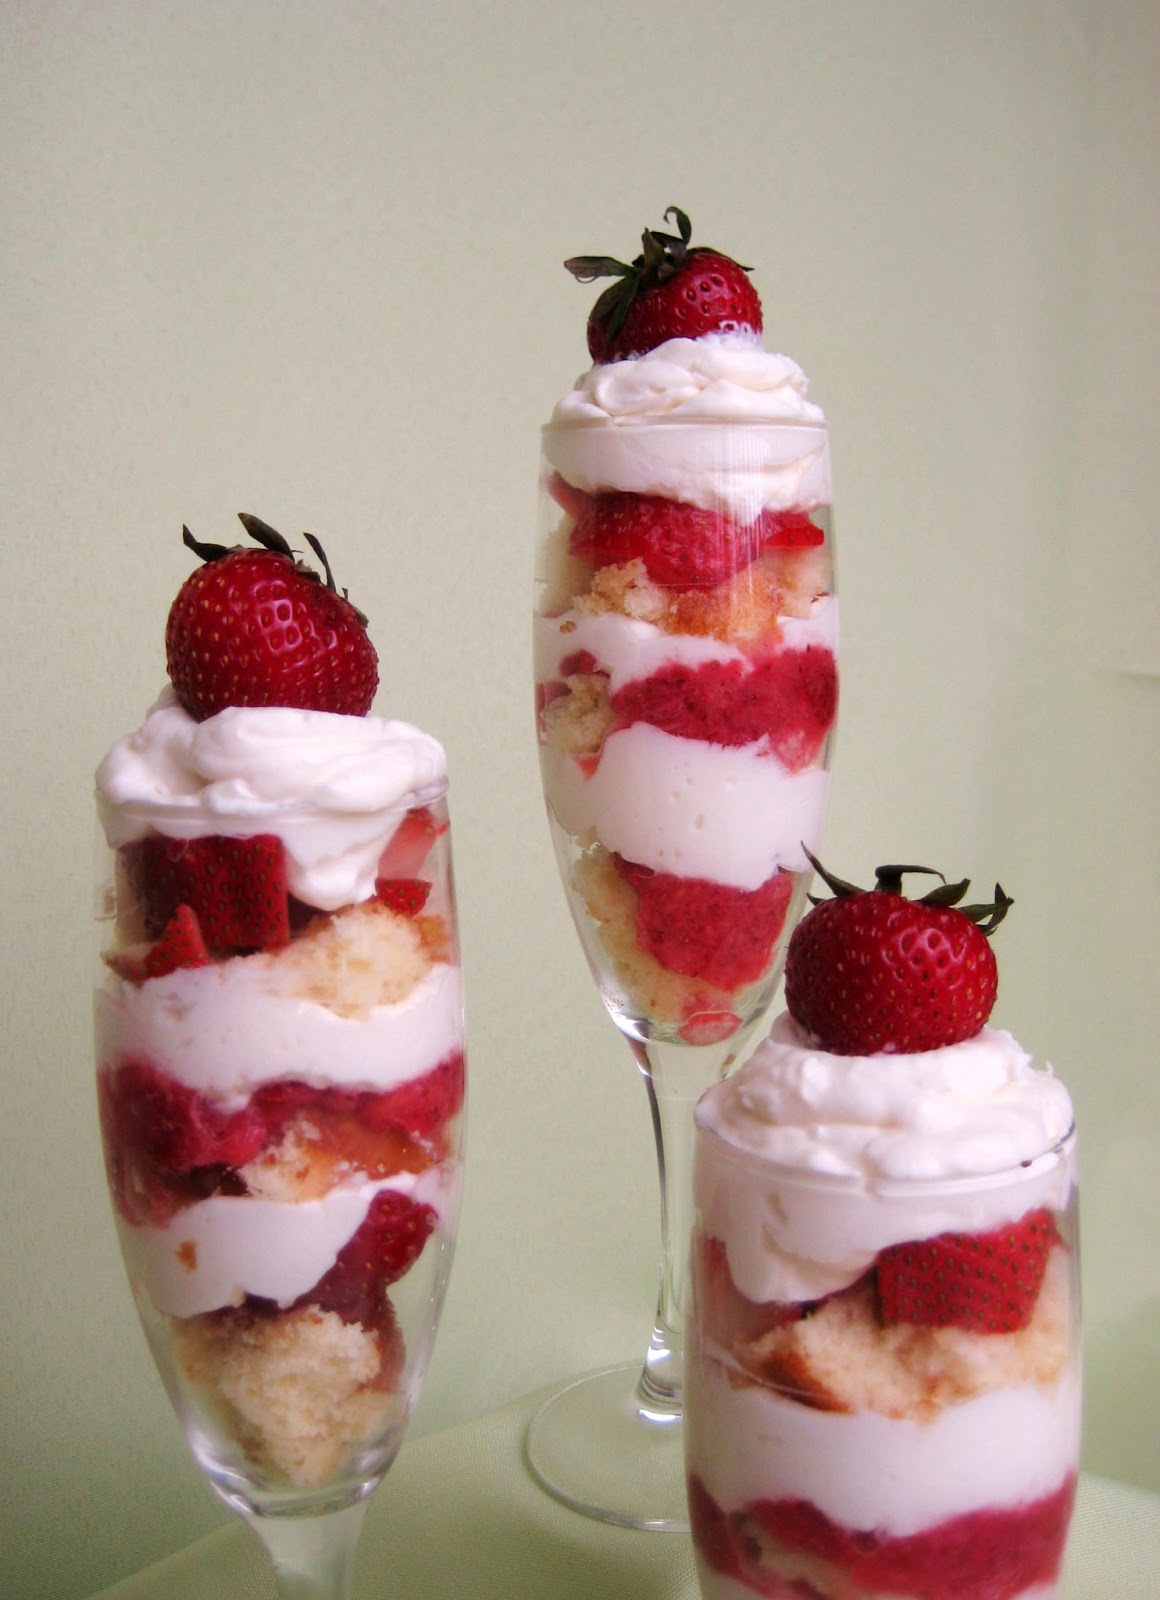
    Just when you thought it couldn't get any better, this recipe comes with a bonus dessert! Since these round cakes are cut from a 9x13 cake, you will have some pieces left over. I suggest layering them in champagne flutes with any extra berries and cream to make some fancy parfaits.

The Science.
    Making fresh fruit desserts in the summer is such a treat, but we need to be careful to enhance the naturally sweet flavors, and not overpower them. Sampling your fruit before you begin to bake will give you an idea of how much sugar you need to add. Baking with berries that are in season improves the chances that their flavor will be optimal, because strawberries are a fruit that must be picked when ripe and will not ripen any further once they are harvested [1]. Immature berries have high levels of citric acid, which is what makes them taste sour. As the fruit matures, the acidity decreases and there is an increase in glucose and fructose sugars [2,3]. The best strawberries will have a balance of sweet and tart flavors, and adding too much refined sugar can upset this balance. Complimenting the fresh strawberries with flavors that are not too sweet ensures that the light, tart notes can still shine through.

The Recipe.

Yellow cake:
1 cup cake flour
1 teaspoon baking powder
1/8 teaspoon salt
5 tablespoons salted butter
3/4 cups sugar
2 eggs
3/4 teaspoon vanilla
1/2 cup buttermilk

    Preheat oven to 350oF. Coat a 9x13 pan with cooking spray and line with parchment paper. In a medium bowl, combine flour, baking powder, and salt. Beat butter in large bowl on medium-high until fluffy, then gradually beat in sugar. Beat eggs in, one at a time. Stir vanilla into buttermilk. Alternately add flour mixture and buttermilk to butter/sugar/egg mixture while beating on low speed.  Beat an additional 30 seconds. Pour batter into mold/pan and spread evenly. Lift and drop on the counter a couple times to eliminate bubbles in the batter. Bake on center rack for 20 minutes, or until a toothpick inserted into cake comes out clean. Cool in pan 5 minutes, remove the parchment paper, then place on wire rack until completely cool.
    If you have a 1.5-inch round cookie cutter, use it to cut out 20 individual cakes. If you're like me and don't have a round cookie cutter, use the rim of a champagne flute. (Doing this is what gave me idea to make parfaits with the leftover cake bits.)

Strawberry Puree:
10-12 strawberries, quartered
2 tablespoons triple sec

    Place quartered strawberries in food processor and pulse in 3 to 5 short bursts, just until chunks are uniform. You should have about 1 to 1 1/2 cups puree. If your strawberries are sweet, you won't need to add any sugar. If they are a little tart, add just enough sugar to take the edge off the tartness. 
    Place puree in a fine mesh strainer and let juices drain into a small saucepan. Set puree aside. Simmer juices over low heat with triple sec until reduced to 2 tablespoons, then stir into puree and refrigerate while making the whipped cream.


Whipped Cream:
4oz cream cheese, room temperature
1 cup 40% heavy whipping cream
pinch salt
1 teaspoon vanilla
2 tablespoons powdered sugar

    Place a medium bowl in an ice bath. Beat cream cheese in the bowl until fluffy. Slowly beat in cream on low speed until incorporated. Add salt, vanilla, and sugar. Beat on high until stiff peaks form, then beat an additional 30 seconds. Keep cream chilled until ready to use.

Assembly:
    Lay cakes out on work surface. Spoon approximately 1 teaspoon of strawberry puree onto each cake, spreading almost to the edges. Place whipped cream in a piping bag fitted with a 1M star tip, and pipe a star on each cake. Top cakes with a halved strawberry. Refrigerate cakes and serve within one day.


1. Kader, A. "Fruit Maturity, Ripening, and Quality Relationships." http://ucce.ucdavis.edu/files/datastore/234-167.pdf
2. Mahmood, T, et al. "Compositional Variation in Sugars and Organic Acids at Different Maturity Stages in Selected Small Fruits from Pakistan." International Journal of Molecular Sciences 2012, Vol. 13(2): pp. 1380-1392.
3. Mikulic-Petkovsek, M et al. "Composition of Sugars, Organic Acids, and Total Phenolics in 25 Wild or Cultivated Berry Species." Journal of Food Science 2012, Vol. 77(10): pp. C1064-C1070.

09 May 2013

Greek Tea Cookies (Kourambiethes)


The Art.
    There's just something about dusting cookies with powdered sugar that makes my mouth water. 
When I was a child, kourambiethes were my favorite cookie for this very reason. When the Greek church would have events, there would be trays and trays of kourambiethes painstakingly prepared by the old Yiayias of the congregation, and let me tell you, these women really knew how important powdered sugar is. Their cookies were piled high with at least an inch of generously sifted powdered sugar, a child's dream come true. Sometimes I really miss those heady days of powdered sugar and cheek pinching, and I get a hankering to make some kourambiethes. Of course, my tastes have changed a bit since then, and I've developed this recipe to make nutty, buttery cookies that aren't too sweet. The trick is to add less sugar to the dough and use salted butter--something most bakers would consider a blasphemy, but I am a strong advocate of complementing sweet flavors with savory ones.

The Science.
    Not only are these tea cookies coated with powdered sugar, they also have a wonderful texture that is light and crumbly. This is because I pulse some of the walnuts into a meal, which releases the oils. Along with the butter, the walnut oils make the cookies "short," meaning that the fats interact with the gluten in the flour and prevent it from holding the cookies together [1]. The walnut meal also makes the cookies lighter because it is more coarse than flour, preventing the butter from making the cookie dense and cakey. Adding a little brandy to the dough not only imparts a deep flavor, the alcohol also inhibits gluten aggregation [2]. The result is a nutty, crumbly cookie with a hint of brandy flavor and sugar.
    One more reason why these cookies turn out amazingly well is because they are baked on a light-colored air bake cookie sheet. The air pockets in the pan and the light color keep the bottom of the cookies from baking faster than the top. If you use a dark pan or your cookies are resting on a thick piece of heat-absorbing metal, your cookies will burn on the bottom before they are done. If you follow this advice with all your cookie recipies, I think you'll find that your cookies will always bake up beautifully even from top to bottom.

The Recipe.

Kourambiethes: (Makes 50)
2 cups chopped walnuts, divided
2 cups flour
¾ t salt
2 sticks salted butter, softened
1/3 cup granulated sugar
1½ teaspoons vanilla
2 tablespoons brandy
1 cup powdered sugar

    Preheat oven to 350F.  Place racks at upper middle and lower middle positions. In medium bowl, combine 1 cup nuts, flour, and salt.  Pulse the remaining cup of nuts in a food processor until fine, about the consistency of corn meal.  Stir into flour mixture. In a large bowl, beat butter and sugar until fluffy.  Beat in vanilla and brandy.  Add flour mixture and mix until evenly incorporated.
    Roll dough into tablespoon-sized balls, and place on an ungreased cookie sheet approximately 1 inch apart.  Bake 35min, or until golden, rotating racks top-to-bottom and front-to-back halfway through to promote even baking. 
     Cool cookies on baking sheet 2min, then roll in powdered sugar while still hot. This gives the cookies a delicious coating of partially melted sugar. Place on cooling rack and cool 25 minutes.  Once completely cool, dust with additional powdered sugar from sifter.

1.  Zannini, E. et al. "Functional Replacements for Gluten." Annual Review of Food Science and Technology 2012, Vol. 3: pp 227-245.
2.  Wieser, H. "Chemistry of gluten proteins." Food Microbiology 2007, Vol. 24(2): pp 115-9.